• Menu
  • Skip to primary navigation
  • Skip to secondary navigation
  • Skip to main content

the tattooed momma logo _ black font transparent background with a capital T in the center of a circle

Wholesome recipes, homeschool resources, and tutorials for all things handmade

  • Pregnancy & Baby
    • to love being a SAHM
    • pregnancy announcement ideas
    • pregnant with pcos
    • top baby items
    • cloth diapers
    • no sew baby wrap
  • Home & Kitchen
    • Beeswax Candles
    • mayonnaise recipe
    • homemade yogurt
    • apple twist yogurt smoothie
    • sweet potato cheesecake yogurt smoothie
    • pumpkin pie yogurt smoothie
    • pumpkin banana bread
    • cast iron Q & A
    • organize board games
    • bagel recipe
  • Homeschool
    • polar bear family activity pack
    • presidents day freebies
    • corn husk dolls
    • thankful turkey
  • Pinata
    • make pinata
      • Pumpkin Pull String Pinata
      • Cocomelon Pinata
      • 4 Leaf Clover Pinata
    • decorate pinata
      • Cocomelon Pinata
      • coloring page pinata
      • modern mexican pinata
      • traditional mexican pinata
    • pinata candy hole
  • Moto
  • About
  • Youtube Videos
  • Privacy Policy
  • Pregnancy & Baby
    • to love being a SAHM
    • pregnancy announcement ideas
    • pregnant with pcos
    • top baby items
    • cloth diapers
    • no sew baby wrap
  • Home & Kitchen
    • Beeswax Candles
    • mayonnaise recipe
    • homemade yogurt
    • apple twist yogurt smoothie
    • sweet potato cheesecake yogurt smoothie
    • pumpkin pie yogurt smoothie
    • pumpkin banana bread
    • cast iron Q & A
    • organize board games
    • bagel recipe
  • Homeschool
    • polar bear family activity pack
    • presidents day freebies
    • corn husk dolls
    • thankful turkey
  • Pinata
    • make pinata
      • Pumpkin Pull String Pinata
      • Cocomelon Pinata
      • 4 Leaf Clover Pinata
    • decorate pinata
      • Cocomelon Pinata
      • coloring page pinata
      • modern mexican pinata
      • traditional mexican pinata
    • pinata candy hole
  • Moto
  • About
  • Youtube Videos

the tattooed momma

Free President’s Day Printable worksheets – best for homeschool

February 23, 2022 //  by thetattooedmomma//  4 Comments

President’s Day Homeschool Worksheets! – free printable

scrunched up usa flag displayed in background with the title "President's Day Homeschool Worksheets for k - 4th grade"

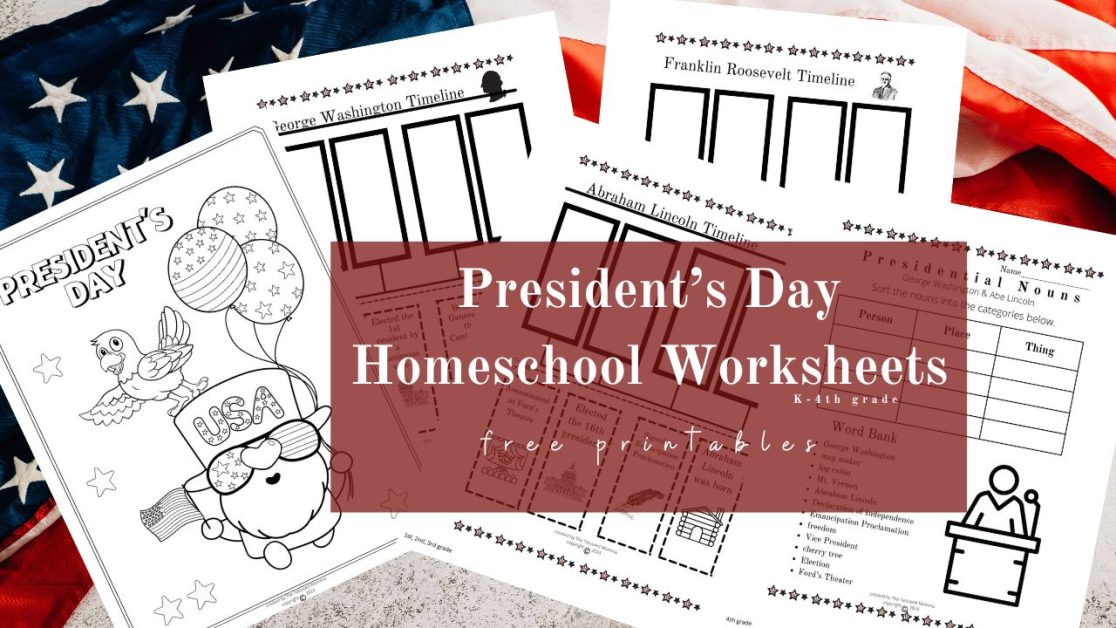
In celebration of President’s Day I’ve created these cool Presidents Day printable worksheets. This Lincoln and Washington activity pack is simple enough for kinder but informative enough that your 1st, 2nd, and 3rd grader can get his learning on too. (A new 4th grader level worksheet now included.)

  • the tattooed momma youtube channel
  • Instagram
  • Mail
  • Facebook
  • Pinterest
  • TikTok

How to incorporate President’s Day into Homeschool

If you’re like me then you didn’t plan to incorporate this holiday into today’s lesson. If that’s the case, then you also don’t have a plan for how to explain how this will work for homeschool. No worries, I’ve already come up with simple explanations below so that you can just copy/paste.

English Language Arts

  • They demonstrated comprehension by organizing and sequencing historical events as well as presidential terms.
  • Developed vocabulary related to political terms and historical events.

History

  • Gained a deeper understanding of the sequence of U.S. presidential history because they created the timeline.
  • Identified key historical figures and their contributions to U.S. history.
  • Explored the impact of major events during different presidencies and their significance.

Math

  • Explored the concept of timelines as a visual representation of numerical and sequential data.

Social Studies

  • They developed spatial awareness and fine motor skills by cutting, pasting, and organizing the timeline elements.
a teaser photo for what the free president's day timeline printable consists of. blue background with a compass, silhouette of George Washington, and a log cabin.

Why You’ll Love these President’s Day Worksheets

Unique – The reason I created these Abraham Lincoln and George Washington worksheets is because when I was searching google for some good homeschool lessons for president’s day, I could only find sheets with basic information. Example: George Washington chopped down the cherry tree (which isn’t even true), Abraham Lincoln is on the penny, blah, blah, blah. I wanted something that would put my kids a bar higher in what they know so I created these simple, yet informative, FREE printables.

Updated 2025: Now also includes Franklin Roosevelt and John Adams. Each year I add 1-2 more presidents to the pack. Let me know in the comments which president you’d like a worksheet for next!

TIPS for Using the President’s Day Worksheets

  • if you don’t want to use the pre-written fun facts in these worksheets, then write your own and have your child paste the ones you’ve created onto the timeline instead.
  • keep the little ones intentionally occupied by giving them the included coloring page so that you can focus on on the older kiddos.
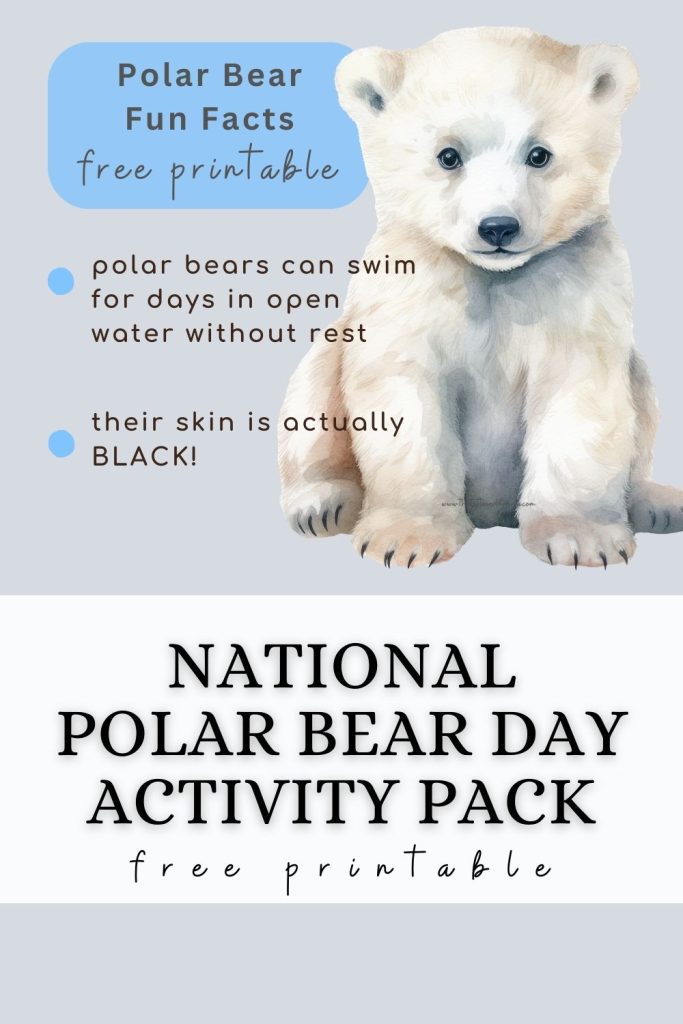
  • Want more printables?! Check out this cool Polar Bear Activity Pack
  • Watch this Youtube Short to get a peak into how we do homeschool.

This post contains affiliate links, which means I make a small commission at no extra cost to you but I only recommend products that I actually use and love. Read the full disclosure here.

Alt text: teaser photo for the free printable President's Day Coloring Page. a little Nome looking character holding 2 balloons in one hand that are decorated with stars and stripes and holding a tiny american flag in the other hand. He's wearing a top hat that says USA and sunglasses that have stars on one lens and stripes on the other lens.

President’s Day Worksheet Answer Key

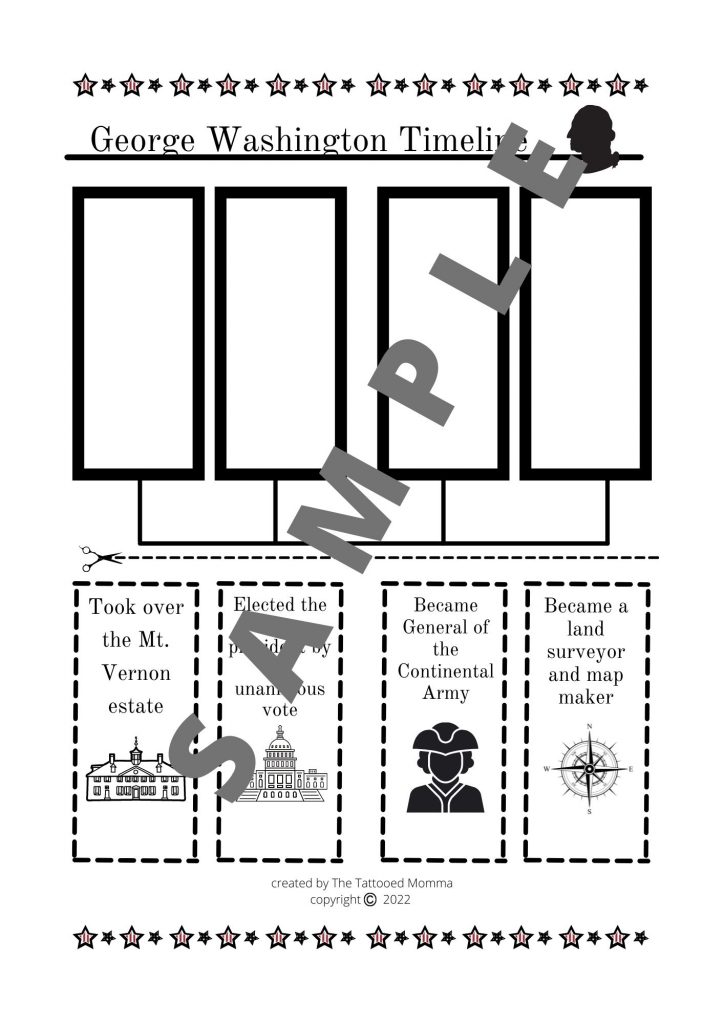
George Washington Timeline Worksheet

  • 1749 – Became a land surveyor and map maker at the age of 17
  • 1754 – Took over the Mt. Vernon Estate
  • 1775 – Became General of the Continental Army
  • 1789 – Elected the president by a unanimous vote

click the video below for a fun and educational George Washington Video for Kids

John Adams Timeline Worksheet

  • 1755 – Graduated from Harvard University
  • 1776 – Aug 2nd, 1776 John Adams signed the Declaration of Independence
  • 1789/1796- became the 1st vice president then the 2nd President of the Unites States
  • 1825 – His eldest son, John Quincy Adams, became the president of the U.S.A.

Abraham Lincoln Timeline Worksheet

  • 1809 – Abraham Lincoln was born in a log cabin
  • 1861 – Elected the 16th president
  • 1863 – Signed the Emancipation Proclamation
  • 1865 – Assassinated at Ford’s Theater

Franklin D Roosevelt Timeline Worksheet

  • 1905 – Married his fifth cousin, Eleanor Roosevelt, then at their wedding he said, “there’s nothing like keeping the name in the family.”
  • 1921 – contracted polio while on vacation in Canada
  • 1933 – became the 32nd president of the United States and served 4 terms
  • 1941 – declared that December 7th is “a date which will live in infamy” then declared war on Japan

Presidential Nouns Worksheet (George & Abe)

  • Person: George Washington, map maker, Abraham Lincoln, President
  • Place: log cabin, Mt. Vernon, Ford’s Theater, Virginia
  • Thing: Continental Congress, Emancipation Proclamation, cherry tree, freedom

Presidential Nouns Worksheet (John Adams & Franklin Roosevelt)

  • Person: John Adams, Franklin Roosevelt, lawyer, Vice President
  • Place: England, White House, Pearl Harbor, Japan
  • Thing: Declaration of Independence, wedding ring, freedom, bomb

Scroll down for your Free President’s Day Printables

presidents day freebies featuring a abe lincoln timeline worksheet
presidents day freebies featuring a george washington timeline worksheet
John Adams Timeline worksheet with the word SAMPLE written across it
Franklin Roosevelt Timeline worksheet with the word SAMPLE written across it
presidents day coloring page with a line drawing of the map of the US with 50 blank stars below that and the word "SAMPLE" written over the page

Let’s Connect!

  • the tattooed momma youtube channel
  • Instagram
  • Mail
  • Facebook
  • Pinterest
  • TikTok

Items you may need for the President’s Day Activity Pack

thomas jefferson, abe lincoln, john adams, and george washington paper dolls being held up by 2 choctaw boys for President's Day
  • U.S. PRESIDENT PAPER DOLLS

One of our favorite ways to spruce up any homeschool lesson is by bringing some sort of “toy” into the mix so for history lessons my secret weapons are these paper dolls by FAMOUS FIGURES. The kiddos looooove using what they’ve learned to bring the characters to life and it gives me a front row seat to their very educational puppet show ;).

Another good reason is that it keeps little hands busy doing something constructive while they listen to the lecture.

2 different famous figures books. one is of the civil war and the other is of the american revolution

all items can be found here in my Amazon Store Front

  • paper
  • pencils
  • erasable pens
  • colored pencils
  • printer ink
  • printer
  • laminator
  • laminating sheets
  • pencil pouch
  • brads
  • pencil sharpener
  • paper clips
  • pencil holder
  • Duck for President

FAQ

I filled out the form. Why haven’t I received my worksheets?

check your spam/junk/promotions folders first. Then add ra****@th**************.com to your email contact list so you always get those goodies. If that doesn’t work, shoot me an email and I will send you the file directly (sometimes I’m running on coffee and essential oils and miss a step.

If I join the email list for this lesson, can I still get more free worksheets?

yes! scroll down to get as many different lessons as you want.

4 by 3 graph with a word bank of President's Day themed nouns below and a line drawing of a man at a podium

How Do You Get the President’s Day Worksheets!?

  1. enter your name and email into the form below
  2. select “President’s Day Activity Pack”
  3. click the send-them-my-way button
  4. check your email and click “download”
  5. (optional) come back and leave a review to let me know what you liked or disliked or make a request for a topic you’d like to see a lesson plan made for.

enter your name & email below to get your free download

Find more printable Homeschool Worksheets

cute polar bear cub sitting down with some fun facts written to the left side of him and the caption "national polar bear day activity pack. free printable"
4 st patricks day themed coloring pages. one is a leprechaun in a pot of gold with the word Lucky written above. next its a sun, clouds, flowers, mountains, and a rainbow going into a pot of gold with the word rainbow written. next is a unicorn sitting beside a pot of gold with a rainbow going over them and the last picture is a girl leprechaun with a rainbow and some flowers behind her
3 native american corn husk dolls made my choctaw children. each having different colored hair varying from orange, brown, black and white.
3 uncolored cute thanksgiving turkey coloring pages displayed on top of each other in a fan type design. beneath that are 2 colored thankful turkey coloring pages.

If you try these worksheets and love them, I would love if you gave it 5 stars! Also, tag me on Instagram @thetattooedmommaofficial.

Recommended

  • How to Make Homemade easy non-toxic Beeswax Candles
  • Easy Homemade Avocado Oil Mayonnaise Recipe
  • How I Got Pregnant with PCOS 5x
  • Free Polar Bear Worksheets for Homeschool – freebie printables
  • Presidents Day Freebies! – free printables
  • the tattooed momma youtube channel
  • Instagram
  • Mail
  • Facebook
  • Pinterest
  • TikTok

sources

fact monster: https://www.factmonster.com/us/government/executive-branch/us-presidents-who-were-related-to-each-other

constitution center: https://constitutioncenter.org/blog/10-interesting-facts-about-young-franklin-d-roosevelt-2

whitehouse: https://www.whitehouse.gov/about-the-white-house/presidents/abraham-lincoln/

https://www.whitehouse.gov/about-the-white-house/presidents/george-washington/

national archives: https://www.archives.gov/exhibits/american_originals_iv/sections/nonjavatext_emancipation.html#:~:text=President%20Abraham%20Lincoln%20issued%20the,and%20henceforward%20shall%20be%20free.%22

mt. vernon: https://www.mountvernon.org/the-estate-gardens/the-mansion/owners-of-mount-vernon/#:~:text=years%20owned%3A%201754%20%2D%201761&text=Thus%2C%20when%20Anne%20died%20in,the%20owner%20of%20Mount%20Vernon

john adams: https://kids.nationalgeographic.com/history/article/john-adams

john adams: Famous Figures of the American Revolution

search bar: presidents day, president’s day, preseident day, free printables, activity pack, homeschool, worksheets, john adams, george washington, abe lincoln, franklin roosevelt

Category: homeschool, parenthoodTag: 1st grade, 2nd grade, 3rd grade, 4th of july, abe lincoln, abraham lincoln, abran lincoln, cherry tree, franklin roosevelet, freebies, george washington, history worksheets for kids, homeschool, honest abe, kinder, kindergarten, patriotic, patriotic worksheets, presidents day, the tattooed momma, united states of america worksheets, united states worksheets, us history, us history worksheets, worksheets for kids

Cozy Apple Twist Yogurt Smoothie – easy and quick

January 29, 2022 //  by thetattooedmomma//  2 Comments

Cozy Apple Twist Yogurt Smoothie Recipe

This easy apple yogurt smoothie is a quick and delicious way to get a cozy tasting meal on the table without feeling the mom guilt.

This post contains affiliate links, which means I make a small commission at no extra cost to you but I only recommend products that I actually use and love. Read the full disclosure here.

scroll down for video and printable recipe

This recipe was inspired by a desperate mom, aka me. Tell me why my kids always want an apple but never finish it.

I was so tired of seeing half eaten apples on the counter tops, in the trash, and sometimes even UNDER THE COUCH – compliments of the 2 year old.

  • the tattooed momma youtube channel
  • Instagram
  • Mail
  • Facebook
  • Pinterest
  • TikTok

So now, whenever there are unwanted kid-apples I slice off the bitten parts then throw them in the blender to make an easy apple twist yogurt smoothie.

To be quite honest, I don’t even get upset about the leftovers anymore because it gives me the excuse to whip up a quick batch of smoothies and call it breakfast.

But in order to keep me from feeling that mom guilt it needs to be tasty, filling, and healthy.

DO I NEED TO USE HOMEMADE YOGURT?

No, I just prefer to make ours using homemade yogurt because its cheaper but store-bought regular yogurt is fine to use also.

WHY NOT JUST USE MILK?

The probiotics in yogurt are what make this cozy treat SUPER HEALTHY!

WHAT IF I’M LACTOSE INTOLERANT?

Many lactose intolerant people can tolerate yogurt but not milk because of the fermentation and straining process. My daughter is very lactose intolerant but has zero problems with the homemade yogurt I make because it’s fermented for a full 24 hours.

scroll to bottom for printable recipe

COZY APPLE TWIST YOGURT SMOOTHIE RECIPE

Combine all the ingredients in a blender and blend until smooth…ie 😉

Pour mixture into your favorite cup then enjoy!

INGREDIENTS

  • 2 cups yogurt (preferably homemade)
  • 1/2 cup ice (about 5 ice cubes) or half cup water
  • 1 raw apple (about 1 cup)
  • 1 tbspn brown sugar
  • 2 tspn cinnamon
  • handful of nuts (about 1/4 cup)
  • optional: 2&1/2 scoops protein powder

Let’s Connect!

  • the tattooed momma youtube channel
  • Instagram
  • Mail
  • Facebook
  • Pinterest
  • TikTok

Pin It!

SHOP THIS POST

  • PROTEIN POWDER
  • WIDE MOUTH MASON JAR SCREW LIDS
  • REG MOUTH MASON JAR SCREW LIDS
  • REG MOUTH MASON JAR DRINK LID TOP
  • STRAWS
  • MASON JAR DRINK LIDS (WIDE MOUTH)
  • MASON JAR DRINK LIDS (REG MOUTH)

YOU’LL ALSO LOVE

How To Make Homemade Bagels
Sweet Potato Cheesecake Yogurt Smoothie
Best Pumpkin Banana Bread
Yield: 2.5 servings/ 5 cups

Cozy Apple Twist Yogurt Smoothie Recipe - quick, healthy, easy

homemade yogurt apple smoothie embellished with a quartered pink lady red yellow apple and a fresh cinnamon stick

This easy apple yogurt smoothie is a quick and delicious way to get a cozy tasting meal on the table without feeling the mom guilt.

Prep Time 5 minutes
Total Time 5 minutes

Ingredients

  • INGREDIENTS
  • • 2 cups yogurt (preferably homemade)
  • • 1/2 cup ice (about 5 ice cubes) or half cup water
  • • 1 raw apple (about 1 cup)
  • • 1 tbsp brown sugar
  • • 2 tspn cinnamon
  • • handful of nuts (about 1/4 cup)
  • • optional: 2&1/2 scoops protein powder

Instructions

    Combine all the ingredients in a blender and blend until
    smooth...ie 😉

    Pour mixture into your favorite cup and enjoy!

© thetattooedmomma
Cuisine: Dessert / Category: sourdough
  • the tattooed momma youtube channel
  • Instagram
  • Mail
  • Facebook
  • Pinterest
  • TikTok

Category: drinks, fermented foods, Our Home, recipesTag: aldifinds, apples, cinnamon, desert, dessert, fall recipes, fermented drinks, fermented foods, from scratch, fuji, healthy, healthy dessert, healthy eats, homemade, homemade greek yogurt, lactose intolerant, nuts, picky eater, pinata, pink lady, protein powder, quick breakfast, quick breakfast ideas, the tattooed mom, the tattooed momma, thetattooedmama, walnuts, yogurt smoothie, yogurt smoothie recipe, yougurt

Easy Sweet Potato Cheesecake Yogurt Smoothie

December 11, 2021 //  by thetattooedmomma//  2 Comments

Easy Sweet Potato Cheesecake Yogurt Smoothie

This Sweet Potato Cheesecake smoothie recipe is an easy way to get a creamy yogurt dessert in by morning and call it a healthy breakfast.

This post contains affiliate links, which means I make a small commission at no extra cost to you. Read the full disclosure here.

scroll down for video and printable recipe

In order to keep grocery cost down most of our cooking is done using in-season ingredients so when fall comes around I tend to get a little carried away with the autumn veggies, mainly sweet potatoes.

Having to come up with a way to use them all up without wearing out my kiddos’ tastes buds was a fun little task.

  • the tattooed momma youtube channel
  • Instagram
  • Mail
  • Facebook
  • Pinterest
  • TikTok

Since the babies are already getting those healthy probiotic benefits from eating our plain homemade yogurt I don’t feel guilty about adding a good amount of sweets to it to make it tasty for them because it is still better than the store bought brands.

The kids yogurt brands from the store might as well be advertised as a spoon full of sugar with a hint of yogurt.

Plus, their taste buds are still developing so as time goes on I just put less sweet stuff until eventually they want just the Greek yogurt with a few berries mixed in.

WHAT’S THE DIFFERENT BETWEEN GREEK YOGURT AND REGULAR?

Greek yogurt and regular yogurt are made using the same ingredients but Greek yogurt is thicker because more of the whey has been strained off.

(If you strain the yogurt long enough then you can even turn it into cream cheese.)

WHY NOT JUST USE MILK?

The probiotics in yogurt are what make this sweet treat HEALTHY!

DO I NEED TO USE HOMEMADE YOGURT?

No, I just prefer to make ours using homemade yogurt because its cheaper but store bought regular yogurt is fine to use also.

1 mason jar filled with home made yogurt and another mason jar filled with pumpkin puree

scroll to bottom for printable recipe

SWEET POTATO CHEESECAKE YOGURT SMOOTHIE RECIPE

Combine all the ingredients in a blender and blend until smooth…ie 😉

Pour mixture into your favorite cup then enjoy!

INGREDIENTS

  • 2 cups yogurt (preferably homemade)
  • 1/2 cup ice (about 5 ice cubes)
  • 1 cup cooked sweet potato
  • 2 tbspn cream cheese
  • 1 tspn cinnamon
  • 1/4 cup nuts
  • optional: 2&1/2 scoops protein powder

Let’s Connect!

  • the tattooed momma youtube channel
  • Instagram
  • Mail
  • Facebook
  • Pinterest
  • TikTok

Pin It!

Yield: 2.5 servings/ 5 cups

Sweet Potato Cheesecake Yogurt Smoothie

cooked sweet potatoes in mason jar with 2 raw ones next to it sitting on a wooden cutting board

This Sweet Potato Cheesecake smoothie recipe is an easy way to get a dessert by morning in and call it a healthy breakfast.

Prep Time 5 minutes
Total Time 5 minutes

Ingredients

  • INGREDIENTS
  • • 2 cups yogurt (preferably homemade)
  • • 1/2 cup ice (about 5 ice cubes)
  • • 1 cup cooked sweet potato
  • • 2 tblspn cream cheese
  • • 1 tspn cinnamon
  • • 1/4 cup nuts
  • • optional: 2&1/2 scoops protein powder

Instructions

    Combine all the ingredients in a blender and blend until
    smooth...ie 😉

    Pour mixture into your favorite cup and enjoy!

© thetattooedmomma
Cuisine: Dessert / Category: sourdough

SHOP THIS POST

  • PROTEIN POWDER
  • (WIDE MOUTH) MASON JAR SCREW LIDS
  • (REG MOUTH) MASON JAR SCREW LIDS
  • (REG MOUTH) MASON JAR DRINK LID TOP
  • STRAWS
  • MASON JAR DRINK LIDS (WIDE MOUTH)
  • MASON JAR DRINK LIDS (REG MOUTH)

YOU’LL ALSO LOVE

How To Make Homemade Bagels
pumpkin pie yogurt smoothie ingredients displayed on a wooden cutting board then 3 mason jars filled with the finished smoothie
Pumpkin Pie Yogurt Smoothie
Best Pumpkin Banana Bread
  • the tattooed momma youtube channel
  • Instagram
  • Mail
  • Facebook
  • Pinterest
  • TikTok

Category: drinks, fermented foods, Our HomeTag: cheesecake, fall recipes, fermented foods, healthy dessert, homemade greek yogurt, protein powder, quick breakfast, quick breakfast ideas, sweet potatoes, thanksgiving leftover recipes, the tattooed momma, yogurt smoothie, yogurt smoothie recipe, yougurt

Best Items for a Happy Perfect Baby

December 7, 2021 //  by thetattooedmomma//  15 Comments

Best Items for a Happy Perfect Baby

Top 10 baby items that make life with a newborn an absolute breeze.

This post contains affiliate links, which means I make a small commission at no extra cost to you. Read the full disclosure here.

Just when you think you know it all, life throws in a baby that puts you to the test.

Being the oldest of 8 kids I assumed I knew everything there was to know about raising a baby. Like what bottle led to less colic, the correct way to swaddle a newborn, and the secret “A La Ru Ru” Mexican lullaby Tia sings to put the baby to sleep.

But we all know that no baby is the same. 4 kids later though, I’ve come up with a pretty solid list of things that will turn any fussy newborn into a happy camper.

Here are my favorite baby items that make for a happy – perfect baby.

  1. baby wrap

Currently 2 of my wraps are handmade and the other is a moby wrap. You can click this video to learn how to make your own!

After our 2nd child was about a year old is when a friend of mine introduced me to this lovely thang. But by that time it was too late so once our 3rd infant came along, I was sprung and she basically lived in my wrap until the day she learned to crawl.

  1. large muslin swaddle blankets

These are the best because they are breathable, stretchy, and snug all at the same time.

Not all muslin swaddles are created the same either! Some are scratchy and some are waaay too thin.

I found these bamboo muslin swaddles to be just the right amount of soft, silky, and stretchy. Amazon’s basic swaddles are also a good choice.

https://www.tiktok.com/@therealtattooedmomma/video/7036850306654801158?lang=en&is_copy_url=0&is_from_webapp=v1&sender_device=pc&sender_web_id=7037507470860305926
  1. pacifiers

The only pacifier I use now are the 0-3 months green avent vanilla scented or the regular 0-3 months dark green ones.

These colors are the softest variations for this brand which means you won’t suffer from sore nips if you are breastfeeding and your baby is more likely to accept this binki.

There seems to be a lot of hate around babies with pacifiers but I am definitely pro paci. For one, babies have a natural desire to suckle and the use of pacifiers have been shown to reduce the chances of SIDS by 90%! read more about that here.

  1. frida snot sucker

I can imagine the queasy look on your face now because that sounds absolutely disgusting. I felt the same way until I got a closer look at it.

The snot never touches you because there is barrier to make sure it stays in the tube.

This gadget is really a God sent item when you have a newborn with the sniffles. It’s heart wrenching to see your child struggle to get a full deep breath because their nasal is clogged up

The Frida Snot Sucker will get it cleared up in seconds.

  • the tattooed momma youtube channel
  • Instagram
  • Mail
  • Facebook
  • Pinterest
  • TikTok
  1. a heavy blanket

A heavy blanket helps comfort baby during nap or sleep time because that little bit of weight makes him feel secure and loved.

For this we use a crocheted blanket that grandma makes but you can get a custom blanket made from this cute shop, Turtley Tangled. I have personally made purchases from her before and they are always flawless.

This organic cotton knitted blanket from Earthloop is the one Baby Forest uses when his crocheted blanky is in the wash.

  1. britax convertible carseat

In 2018 we learned about the high infant fatality rates with babies in newborn-carrier car seats. Ever since then we ditched the newborn-carriers and only use the britax convertible carseat. It has enough padding so baby is comfy and is the only carseat you’ll need from newborn (even premie) up to 8 years old but has a shelf life of 10 years.

  1. automatic manual breastpump

This is only if you are nursing your baby.

The Bumble Bee Breast Pump has helped me keep up milk supply by leaps and bounds.

You just attach it to whatever side you are not feeding on and it pulls milk out which also makes your body think it needs to produce more. I’m never worried if my baby is getting enough milk because this helps me keep an excess amount on demand.

Attach it once and let it do the rest. The option with this stopper is definitely recommended to avoid crying over spilled milk 😉

  1. baby bibs

Any bib will do but here are the ones I use currently.

Keeping a bib on baby while he’s being burped helps keep any spit up from getting onto his clothing and stuck inbetween those baby neck rolls. Meaning less times being changed and less time the baby needs to be bothered.

  1. black and white baby toys

These are my current favorite because they are soft, squishy, have high contrasting colors, and make a light tinkling noise.

You don’t need to have a lot of toys around for your newborn but having 1 or 2 visually stimulating ones are great for brain development.

It also keeps them entertained for a few more minutes so you can do some of the other things on your list.

  1. zip up sleepers

Sleepers that zip up are such a game changer because it makes getting the baby dressed and undressed a cinch.

Imagine matching and buttoning 20 little buttons while baby is screaming? No thank you bruh.

I keep 5 – 7 of these in each size until the baby is either potty trained or out of 3T clothes.

We use the warm Carters sleepers during the cold months and these 100% organic cotton sleepers from Burt’s Bees when it starts getting a bit warmer.

SHOP THIS POST

  1. BABY WRAP
  2. SWADDLE BLANKETS
  3. PACIFIERS
  4. FRIDA SNOT SUCKER
  5. BABY BLANKET
  6. BRITAX CONVERTIBLE CARSEAT
  7. BREAST PUMP
  8. BIBS
  9. BABY TOYS
  10. ZIP UP SLEEPERS: Burt’s Bees & Carter’s

Let’s Connect!

  • the tattooed momma youtube channel
  • Instagram
  • Mail
  • Facebook
  • Pinterest
  • TikTok

Pin It!

You’ll also Love!

first photo is the tattooed momma 33 weeks pregnant at 29 years old with her 4th baby taking a picture in front of the bathroom mirror with the title "how i got pregnant with P.C.O.S. 5 times". the bottom 4 pictures are a pink cartoon drawing of a woman's uterus, an abstract simple drawing of hormones in a random chain, the universal logo for woman, and a hormone symbol to the upper right of her. the fourth photo is the women's symbol for hormones
Pregnant with PCOS
5 cloth diaper on a clothes line and a toddler sitting on a potty with the title "4 reasons why you want to cloth diaper"
Cloth Diapering
3 native american corn husk dolls made my choctaw children. each having different colored hair varying from orange, brown, black and white.
DIY Corn Husk Dolls
  • the tattooed momma youtube channel
  • Instagram
  • Mail
  • Facebook
  • Pinterest
  • TikTok

Category: BABY, Our HomeTag: baby, baby bib, baby clothes, breast pump, crocheted blanket, crochetted blanket, diy wrap, frida, frida nose sucker, frida snot sucker, haaka, handmade baby blanket, heavy baby blanket, moby wrap, pacifier, swaddle blankets, the tattooed momma, visually stimulating baby toys, zip up sleepers

Amazing Pumpkin Pie Yogurt Smoothie Recipe

December 3, 2021 //  by thetattooedmomma//  1 Comment

Healthy Pumpkin Pie Yogurt Smoothie

This fall inspired pumpkin pie yogurt smoothie is a delicious way to indulge in some dessert flavor, without feeling guilty.

pumpkin pie yogurt smoothie ingredients

scroll down for video and printable recipe

Where we live it doesn’t start to get cold until Winter time so baking warm bread and pumpkin pie isn’t something we can enjoy during Fall.

Turning a yogurt smoothie into a pumpkin pie is our way to stay cool but not miss out on those delicious fall flavors.

Before I go into the recipe let me take you on a trip to the past…*cue warpy video imaging and time capsule music*

When I was a little girl I was NOT A FAN of sushi so my Godfather would pack on the soy sauce for me to get me to eat it. After that, he would pour less soy sauce on my plate each time he would make it.

Little did I know, he was training my tiny taste buds until one day I could have the sushi without any added flavor at all and really actually enjoy it.

*fast forward to present day* when I use his method for everything new with my kids, including yogurt!

greek yogurt, brown sugar, pumpkin spice, and pumpkin puree displayed on a wooden cutting board.

WHAT IS GREEK YOGURT?

Greek yogurt and regular yogurt are made using the same ingredients but Greek yogurt is thicker because more of the whey has been strained off.

(If you strain the yogurt long enough then you can even turn it into cream cheese.)

WHY NOT JUST USE MILK TO MAKE THIS PUMPKIN PIE SMOOTHIE?

The probiotics in yogurt are what make this sweet treat HEALTHY!

DO I NEED GREEK YOGURT TO MAKE THIS?

No, I just prefer to make ours using homemade greek yogurt but store bought regular yogurt is fine to use also.

1 mason jar filled with home made yogurt and another mason jar filled with pumpkin puree

scroll to bottom for printable recipe

PUMPKIN PIE YOGURT SMOOTHIE RECIPE

Combine all the ingredients in a blender and blend until smooth…ie 😉

Pour mixture into your favorite cup then enjoy!

INGREDIENTS

  • 2 cups yogurt (preferably homemade)
  • 1/2 cup ice (about 5 ice cubes)
  • 1 cup pumpkin puree
  • 1&1/2 tspn pumpkin spice
  • 1 tblspn brown sugar (add more until your taste buds say “yum”)
  • 1/4 cup nuts
  • optional: 2&1/2 scoops protein powder

follow me on instagram for funny reels and daily extras,

SHOP THIS POST

  • PROTEIN POWDER
  • WIDE MOUTH MASON JAR SCREW LIDS
  • REG MOUTH MASON JAR SCREW LIDS
  • REG MOUTH MASON JAR DRINK LID TOP
  • STRAWS
  • MASON JAR DRINK LIDS (WIDE MOUTH)
  • MASON JAR DRINK LIDS (REG MOUTH)

YOU’LL ALSO LOVE

Easy SourghDough Bagel Recipe

Make your own Baby Carrier

Turning A Closet into a Baby Nursery

Make A Pinata

Yield: 2.5 servings/ 5 cups

Pumpkin Pie Yogurt Smoothie

pumpkin pie yogurt smoothie ingredients displayed on wood

A fall inspired pumpkin pie yogurt smoothie for a delicious way to indulge in some dessert flavor without feeling guilty.

Prep Time 5 minutes
Total Time 5 minutes

Ingredients

  • INGREDIENTS
  • • 2 cups yogurt (preferably homemade)
  • • 1/2 cup ice (about 5 ice cubes)
  • • 1 cup pumpkin puree
  • • 1 and 1/2 tspn pumpkin spice
  • • 1 tblspn brown sugar (add more until your taste buds say "yum")
  • • 1/4 cup nuts
  • • optional: 2&1/2 scoops protein powder

Instructions

    Combine all the ingredients in a blender and blend until
    smooth...ie 😉

    Pour mixture into your favorite cup and enjoy!

© thetattooedmomma
Cuisine: Dessert / Category: sourdough

Category: drinks, Our HomeTag: autumn recipes, desserts, fall desserts, fall drink recipe, fall recipes, healthy food, pumpkin desserts, pumpkin receipe, pumpkin yogurt, pumpkin yogurt smoothie, pumpkin yogurt smoothie recipe, the tattooed momma, yogurt, yogurt smoothie, yogurt smoothie recipe

An Easy & Quick Thankful Turkey Homeschool Activity for Thanksgiving

November 23, 2021 //  by thetattooedmomma//  Leave a Comment

Thankful Turkey Activity + coloring page

A cute Thanksgiving activity for parents looking for a quick Thanksgiving activity to do with the kiddos.

assortment of colorful target brand crayons laid across a thanksgiving activity

I found myself disappointed while digging around for a quick homeschool activity to do with the kids for Thanksgiving.

The cute ones required payment and the others didn’t have enough of a learning aspect to them so I decided to create my own instead and share it with all of you.

Below you will find an adorable turkey activity that can incorporate social studies, language, creativity, and even a little science.

My 3 year old wasn’t able to cut everything on her own so I made a Turkey coloring page for her which I have also included as a free printable.

thanksgiving turkey coloring page that is already colored in with pink, blue, and brown crayon.

supplies

  • scissors
  • crayons
  • glue or tape

step by step guide

  1. print out your Thankful Turkey by clicking one or both of the options below.
thankful turkey free printable activity
thanksgiving turkey coloring page free printable
  1. draw the wattle

educational fun fact: All turkeys have wattles but only the males gobble. The males use their special gobble noise to attract females.

I chose to not include the wattle in the printable so the kids learn this as one of the identifiers for a turkey.

line drawing of a turkey with a wattle being drawn on
  1. Color the rest of it in

I chose more traditional Thanksgiving turkey colors but feel free to really get creative with it.

line drawing of a turkey colored in using brown, black, and orange crayon

For funny reels and daily extras, follow me on instagram

  1. fill in the blanks

write down what you’re thankful for in the feathers then color those in too. It’s ok to go outside the lines because you’ll be cutting everything out in the next step.

  1. cut, assemble, and glue

cut your turkey and the feathers out then glue the feathers to the back of the turkey. It might be easier for the younger ones to just tape everything on.

once you put it all together, post it to instagram and tag thetattooed.momma to be featured in stories!

Brand new to The Tattooed Momma, Click below for my most popular posts/videos.

DIY Native American Corn Husk Dolls

Make your own Baby Carrier

Turning A Closet into a Baby Nursery

Make A Pinata

How to Moby Wrap

other Thankful Turkey creations

Category: CREATE, homeschoolTag: activities for kids, free printable, free turkey line drawing, kid thanksgiving, thankful turkey, thanksgiving coloring page, thanksgiving craft, the tattooed momma, turkey line drawing, writing practice

How to Make a Pumpkin Pull String Pinata – EASY

October 30, 2021 //  by thetattooedmomma//  1 Comment

How to Make a Pumpkin Pull String Pinata

Easy to follow step by step tutorial to make your very own Pull String Pinata – pumpkin.

hand made pull string pinata decorate as a cute girl pumpkin with a purple tissue bow

Let’s cut the chit chat and get right into it. You can also scroll down for the printable how to.

SUPPLIES TO MAKE A PUMPKIN PULL STRING PINATA

  • cardboard
  • hot glue gun
  • scissors
  • pen or pencil or marker
  • box cutter or razor
  • masking tape
  • string/ribbon
  • rope (for the pinata handle)

SUPPLIES TO DECORATE A PUMPKIN PULL STRING PINATA

  • orange, black, and brown (or green) tissue paper
  • school glue
  • paint brush
  • water
  • mixing bowl
  • pink, black, and white cardstock
  • purple tissue paper (for the bow)

Step by Step Guide

  1. cut out shapes
    • trace then cut 2 pumpkin pieces out of cardboard. click one of the pictures below for a FREE printable template.

scroll to bottom for video how to

  1. 4″ strips for sides of pinata
    • cut out a few 4” wide cardboard strips – length doesn’t matter

cut against the corrugation because it will make things easier when bending the sides around the top and bottom pinata pieces.

  1. prep the masking tape
    • Rip off a bunch of pieces of masking tape then place them around your work area

This is not a “less is more” situation so go overboard because we will be using a lot of tape.

  1. Assemble Pinata
    • Take one of your top or bottom pieces then start attaching a 4” side piece using the pre cut masking tape.

To connect another 4” side piece, slide it in the back of the already attached piece then staple them together.

  1. Attaching the Rope
    • poke 2 holes in the top of the pinata to loop the rope through
    • cut a piece of rope, loop it through, then tie a knot at each end to secure it in place
    • give it a good tug to make certain it’s secure
  1. Strengthening the Pinata
    • Take a left over 4” side piece and cut it about 5-7” long then bend it into a tube and secure it with a piece of masking tape.
    • using a glue gun, attach the tube in the center of the piñata

Since this is a pull string pinata, it only need 1 tube.

  1. Attach the other top Piece
    • do this the same way you did the first piece by taping 4” side pieces until you’ve gone all the way around.

For funny reels and daily extras, follow me on instagram

  1. Decorate
    • glue mixture
      • make a glue mixture by combining school glue with water until it is about the consistency of pancake batter.
    • back piece
      • put glue along the edges of the back side of the pumpkin then add 2 layers of black tissue paper.
      • glue any excess tissue paper that is hanging over down the sides of the pinata.
    • front piece
      • glue orange fringed tissue paper to the pumpkin by starting at the bottom then working your way up 1 line at a time.
      • to make the fringe, cut the tissue paper into 4″ wide strips – length doesn’t matter. Fold the 4″ tissue paper strips in half then start cutting little slices from one end to the other on the folded side. Only cut about 3/4’s of the way up and try doing multiple pieces at once to save time.
      • once finished, trim off any excess fringe that is hanging over.
    • the pumpkin stem
      • use brown fringed tissue paper for the stem
  1. Decorate cont.
    • sides
      • cut 4″ wide strips of black tissue paper then glue them all the way around the sides.
    • the face
      • black eyes – I traced a ribbon roll (about 3 & 1/2 inches wide)
      • white specs in eyes – I traced a nickel and new pencil eraser
      • black mouth – I traced a half circle ruler then trimmed it down to fit below the eyes.
      • pink tongue – I free hand drew a half circle, glued it to the black mouth, then trimmed off the excess.
      • rosy cheeks – I traced a quarter
  1. Decorate cont.
    • bow (any color tissue paper)
      • cut a whole piece of tissue paper in half, discard one piece, then fold the leftover piece in half. Turn it long ways and fold it over itself until you have a folded up rectangle.
      • start in the center and pinch and fold the tissue paper back and forth to make it look like a bow.
      • tie a ribbon around the center to secure then glue it onto the pumpkin.
  1. Pull String
    • make 3 slits in the bottom of the pinata to form a flap then poke a bunch of holes into the flap for the strings to fit through.
    • make a huge knot in one of the ribbons so it can’t slide through the hole. (You can add some hot glue to it if needed for extra security.
    • slide the rest of the ribbons into the holes. Do not tie knots into these because you want these ribbons to be able to slide out of the holes easily.
    • Cut a small piece of cardboard then staple it onto the flap with half of it hanging off.
    • Fill the pinata with toys or candy and push the pull string flap back in place.

And that’s it! I would love to see what you created so tag me on instagram! @thetattooed.momma

If you’re Brand new to The Tattooed Momma then Click below for my most popular posts/videos.

Easy SourghDough Bagel Recipe

Make your own Baby Carrier

Turning A Closet into a Baby Nursery

Make A Pinata

How to Moby Wrap

Category: DIY's, PinataTag: crafts for kids, diy pinata, easy diy, how to decorate a pinata, how to make a pinata, party activities, party games, pull string, pull string pinata, pumpkin, pumpkin pinata, pumpkin pull string pinata, the tattooed momma

How To Make Sourdough Pumpkin Banana Bread

October 1, 2021 //  by thetattooedmomma//  15 Comments

Quick Pumpkin Banana Bread with Sourdough Starter

A pumpkin twist on the classic banana bread – and just in time for Halloween! Great for sourdough discard but Long Fermented version included too.

sourdough pumpkin banana bread in a glass loaf pan topped with walnuts and brown sugar

All my kids are OBSESSED with banana bread – thanks to my husband showing them the viral banana bread at work video.

But Even though they never get tired of eating the same old recipe, I really do get tired of making it so I’m constantly looking for new ways to spice it up.

I am happy to say that this pumpkin version is my family’s new ABSOLUTE FAVORITE way to eat sourdough banana bread and it is so good, I’ve already made it 3 times this week!

sourdough discard pumpkin banana bread topped with walnuts on top of a olive wood cutting board next to a yellow fall kitchen towel.

Pumpkins have been the inspiration to all my cooking lately for a couple reasons. Most obvious, it’s pumpkin season.

But the biggest reason is we’re expecting our 4th baby, due on Halloween which has earned him the cute nickname of “Pumpkin Baby“. So I’m a little bit obsessed with all things pumpkin at the moment.

Even my kids asked me the other day “why does all our food have pumpkin in it?” – whoops!

sliced loaf of fresh out the oven bread

WHAT IS SOURDOUGH STARTER?

Sourdough starter is just flour and water mixed together then left to ferment. After it has become “mature” enough, it has the ability to make dough rise. In laments terms: sourdough starter = YEAST PACKETS.

IS SOURDOUGH STARTER BETTER THAN USING YEAST PACKETS?

This depends on what’s more important to you. Faster rising time or healthier bread?

If you use yeast packets, the time it takes to get your breads to rise is shorter. But when you use sourdough starter in your dough, it breaks down the phytates in the grains making it easier for your body to absorb as much of the nutrients in grains as possible. Here’s a link to a great article all about it.

DO I NEED A STARTER TO MAKE THIS PUMPKIN BANANA BREAD?

NOPE! In fact, you don’t even need yeast packets. I just like any excuse to use sourdough starter so I incorporate it when I can. The conversion without the starter will be in the recipe section for you. 🙂

banana bread hell yea

scroll to bottom for printable recipe

PUMPKIN BANANA BREAD (QUICK VERSION)

Preheat oven to 325 degrees.

Combine all the dry ingredients in a bowl and all the wet ingredients in a separate bowl then mix them all together.

Pour mixture into a bread loaf pan and sprinkle walnuts & brown sugar on top. Then place into preheated oven for 90 minutes. Check on it after 70 minutes by inserting a toothpick into the center of the loaf. If the toothpick comes out clean, its ready! If not, continue cooking 10 minutes at a time until done.

Let it sit in the loaf pan for 1 hour to cool before slicing into it.

INGREDIENTS

DRY INGREDIENTS

  • 2 and 1/2 cup All Purpose Flour
  • 1 tsp Baking Soda
  • 1 tsp Baking Powder
  • 1/4 tsp Salt
  • 1 tbsp Cinnamon
  • 1 and 1/2 tsp pumpkin spice
  • 1/4 cup packed Brown Sugar (in and some more sprinkled on top)
  • Optional: 1/4 cup walnuts (in and some more sprinkled on top)

WET INGREDIENTS

  • 1 very Ripe Banana (about 1/2 cup)
  • 1/2 cup Pumpkin Puree
  • 2 Eggs
  • 1/2 cup Maple Syrup (or honey)
  • 1/2 cup Butter
  • 1/4 cup Banana Milk (any milk will do for this. almond, whole, 1%, oat, etc)
  • 1/2 tsp Vanilla Extract
  • 1/4 tsp Almond Extract
  • Optional: 1/2 cup sourdough starter (or 1 tspn yeast mixed with 1/2 cup warm water)
home made pumpkin banana bread

For funny reels and daily extras, follow me on instagram

PUMPKIN BANANA BREAD (LONG FERMENTED VERSION)

THE NIGHT BEFORE

Combine sourdough starter, flour, cinnamon, maple syrup, butter, and milk together in a large bowl. Cover and let it sit overnight or 8-10 hours.

THE NEXT DAY

Add the remaining ingredients

Preheat oven to 325 degrees.

Pour mixture into a bread loaf pan and sprinkle walnuts & brown sugar on top. Then place into preheated oven for 90 minutes. Check on it after 70 minutes by inserting a toothpick into the center of the loaf. If the toothpick comes out clean, its ready! If not, continue cooking 10 minutes at a time until done.

Let it sit in the loaf pan for 1 hour to cool before slicing into it.

DRY INGREDIENTS

  • 2 and 1/2 cup All Purpose Flour
  • 1 tsp Baking Soda
  • 1 tsp Baking Powder
  • 1/4 tsp Salt
  • 1 tbsp Cinnamon
  • 1 and 1/2 tsp pumpkin spice
  • 1/4 cup packed Brown Sugar (in and some more sprinkled on top)
  • Optional: 1/4 cup walnuts (in and some more sprinkled on top)

WET INGREDIENTS

  • 1 very Ripe Banana (about 1/2 cup)
  • 1/2 cup Pumpkin Puree
  • 2 Eggs
  • 1/2 cup Maple Syrup (or honey)
  • 1/2 cup Butter
  • 1/4 cup Banana Milk (any milk will do for this. almond, whole, 1%, oat, etc)
  • 1/2 tsp Vanilla Extract
  • optional: 1/4 tsp Almond Extract
  • optional: 1/2 cup sourdough starter (or 1 tspn yeast mixed with 1/2 cup warm water)
pinterest pin of 3 loaves of pumpkin banana bread.

SHOP THIS POST

  • BREAD LOAF DISH
  • CAST IRON LOAF DISH
  • WOOD CUTTING BOARD

YOU’LL ALSO LOVE

Easy SourghDough Bagel Recipe

Make your own Baby Carrier

Turning A Closet into a Baby Nursery

Make A Pinata

How to Moby Wrap

Yield: 1 loaf

Sourdough Pumpkin Banana Bread

pumpkin banana bread topped with walnuts and sitting on top of a wooden vintage hutch

A pumpkin twist on the classic banana bread. Great for sourdough discard but Long Fermented version included too.

Prep Time 20 minutes
Cook Time 1 hour 30 minutes
Total Time 1 hour 50 minutes

Ingredients

  • DRY INGREDIENTS
  • • 2 & 1/2 cups all purpose flour
  • • 1 tsp baking soda
  • • 1 tsp baking powder
  • • 1/4 tsp salt
  • • 1 tbsp cinnamon
  • • 1 and 1/2 tspn pumpkin spice
  • • 1/4 cup packed brown sugar
  • • optional: walnuts (just on top)
  • WET INGREDIENTS
  • • 1 very ripe banana (about 1/2 cup)
  • • 1/2 cup pumpkin puree
  • • 2 eggs
  • • 1/2 cup maple syrup (or honey)
  • • 1/2 cup butter
  • • 1/4 cup banana milk (any milk will do for this. almond, whole, 1% oat, etc)
  • • 1 tsp vanilla extract
  • • optional: 1/4 tsp almond extract
  • • optional: 1/2 cup sourdough starter (or 1 tspn yeast mixed with 1/2 cup warm water)

Instructions

    (for LONG FERMENTED VERSION SEE NOTES SECTION)

    Preheat oven to 325°

    Combine all the dry ingredients into a bowl. In a separate bowl combine all the wet ingredients. Now combine wet and dry ingredients.

    Pour mixture into a bread loaf pan then sprinkle walnuts and more brown sugar on top.

    Place bread loaf pan into preheated oven for 90 minutes. Check on it after 70 minutes by inserting a toothpick into the center of the loaf. If the toothpick comes out clean then it's ready! If not, continue cooking 10 minutes at a time until done.

    Let it rest in the loaf pan on your counter top for 1 hour to cool before slicing into it.

Notes

LONG FERMENTED VERSION

THE NIGHT BEFORE

Combine sourdough starter, flour, cinnamon, maple syrup, butter, and milk together in a large bowl. Cover and let sit overnight (8 to 12 hours)

THE NEXT DAY

Add the remaining ingredients.

Preheat oven to 325°

Combine all the dry ingredients into a bowl. In a separate bowl combine all the wet ingredients. Now combine wet and dry ingredients.

Pour mixture into a bread loaf pan then sprinkle walnuts and more brown sugar on top.

Place bread loaf pan into preheated oven for 90 minutes. Check on it after 70 minutes by inserting a toothpick into the center of the loaf. If the toothpick comes out clean then it's ready! If not, continue cooking 10 minutes at a time until done.

Let it rest in the loaf pan on your counter top for 1 hour to cool before slicing into it.

© thetattooedmomma
Cuisine: Dessert / Category: sourdough

Category: Our Home, sourdoughTag: autumn recipes, banana bread, banana bread hell yea, desserts, fall desserts, fall recipes, pumpkin banana bread, pumpkin bread, pumpkin desserts, pumpkin receipe, sourdough discard recipe, sourdough starter recipe, the tattooed momma

How To Make A 4 Leaf Clover Pinata

March 16, 2021 //  by thetattooedmomma//  3 Comments

How To Make A 4 Leaf Clover Pinata

Follow along as I show you just how easy it is to make this 4 leaf clover pinata – perfect for st patricks day.

4 leaf clover shamrock pinata decorated in dark green, green, and pastel green cardstock with dark green fringe along the edges. it is sitting on a vintage oak hutch with 12 U.S. golden dollar coins sitting to the right of it.
  • the tattooed momma youtube channel
  • Instagram
  • Mail
  • Facebook
  • Pinterest
  • TikTok

You’re probably thinking “why would I make a Mexican pinata for St Patricks Day”? The answer is clear, BECAUSE YOU CAN’T HAVE A FUN PARTY WITHOUT A PINATA.

In all seriousness though I love making this lucky charm with my kids because it’s an excuse to bash something in and seeing their eyes glisten when golden dollars go flying out of the pinata is so heart warming.

I actually thought I was the only one that would ever make a 4 leaf clover pinata but I recently came across a subscriber on my Youtube channel who mentioned her friends do an Extreme Green party for St. Pattys Day and that one comment made this entire post so worth my time.

since I make piñatas specifically for my kids, I’ve included some fun St. Patrick’s Day themed coloring pages for your kiddos as an extra bonus freebie. fill out the form below to get yours.

scroll down for free downloadable pinata template or St. Patricks Day coloring pages

keep scrolling down to the bottom for free pinata template downloads

These instructions are for a 4 leaf clover pinata but the steps apply for any pinata you want to make.

INSTRUCTIONS – 4 leaf clover pianta

  1. trace & cut
    • trace 2 identical 4 leaf clovers (one for the front and one for the back of the pinata) onto cardboard then cut them out with a box cutter or xacto knife. You can use scissors but it will be more difficult. (free download for 4 leaf clover piñata is located at end of post)

The best cardboard to use for piñatas are the Costco carboard sheets because they’re the perfect thickness/thiness. They are usually stuffed in between the steel cages or within layers of product but if you can’t find any, just ask an employee for a SLIP SHEET – they’ll know what you mean.

Any cardboard will work though. For this 4 leaf clover pinata, I’m using the packaging box from my daughter’s Disney Frozen table.

cutting out a 4 leaf clover shape using a box cutter
  1. sides
    • with the leftover cardboard, cut out a bunch of 4″ wide strips – these will be the sides. The length doesn’t matter, but be sure to cut against the corrugation.
a pile of 4" wide cardboard strips
dotted line going across a piece of cardboard
  1. assemble
    • using masking tape, start attaching the 4″ cardboard strips to one of the 4 leaf clover cut outs. Do this until you have gone all the way around.

DO NOT ATTACH THE OTHER 4 LEAF CLOVER CUT OUT YET.

1 piece of masking tape being attached to 4 leaf clover pinata template
4 leaf clover pinata being assembled using masking tape and cardboard
4 leaf clover pinata with bottom and sides assembled
  1. attaching the rope + rope cardboard piece
    • staple a leftover 4″ side cardboard piece where you want the rope to be (this will give the pinata some extra strength when the candy is added)
    • poke 2 holes wherever you want the rope to be
    • loop it through the holes then tie a knot at each end to secure it in place
    • give it a good tug to make certain it’s secure
placing an extra piece of cardboard where the handle for the 4 leaf clover pinata will go
poking 2 holes for the 4 leaf clover pinata rope to loop through
half finished 4 leaf clover pinata with handle attached
  1. toughening up the pinata
    • This step is optional but I highly recommend doing it. It’s extra work but well worth it in the end.
    • Fold one of your 4″ strips to resemble a toilet paper roll and glue it in the center of your pinata.

If you made a larger pinata then add a few more pieces but spaced apart. The more you add the tougher the pinata will be.

toilet paper roll
toilet paper roll glued to center of the 4 leaf clover pinata
  1. attach the other side
    • attach the other 4 leaf clover pinata cut out using masking tape.
masking tape being use to hold together a shamrock pinata
  1. reinforce
    • To make sure all parts of the pinata stay in place, tape long pieces of masking tape around the entire pinata. Use the same motion as if you were winding up a ball of yarn.

I used blue painters tape here for a better visual but I don’t recommend using painters tape because it does not stick well.

blue painters tape wrapped around 4 leaf clover pinata

SHOP THIS POST

  • BOX CUTTER
  • PRECISION KNIFE (comparable to xacto knife)
  • PINATA ROPE
  • MASKING TAPE
  • STAPLER
  • TISSUE PAPER MULTI COLORS
  • TISSUE PAPER MULTI COLORED WITH GOLD & SILVER
  • SCISSORS
  1. decorate
    • click one of the tutorials below
pinata decorated with white buther paper and outlined with black paint to look like a coloring page
Traditional Mexican Pinata made using green fringed crepe paper
st patricks day pinata decorated with dark and light green card stock

Let’s Connect!

  • the tattooed momma youtube channel
  • Instagram
  • Mail
  • Facebook
  • Pinterest
  • TikTok

Pin It: 4 leaf clover stuffs

4 leaf clover pinata turtorial pinterest pin

YOU’LL ALSO LOVE

number 2 cocomelon inspired pinata and a boy cocomelon logo pinata
Cocomelon Pinata Tutorial
How to cut the Piñata Candy Hole
Pull String Pinata Tutorial

This post contains affiliate links, which means I make a small commission at no extra cost to you but I only recommend products that I actually use and love. Read the full disclosure here.

  • the tattooed momma youtube channel
  • Instagram
  • Mail
  • Facebook
  • Pinterest
  • TikTok

Category: DIY's, holiday, Pinata, st patricks dayTag: 4 leaf clover, birthday party, birthday party games, birthday party games for kids, cheap party ideas, diy pinata, extreme green, how to decorate a pinata, how to make a pinata, pinata, saint patrick, shamrock, st patricks day, st patricks day activities, st patricks day crafts, st pattys day, strong pinata, the tattooed momma, tough pinata

  • Privacy Policy

Copyright © 2025 · Mai Lifestyle Pro on Genesis Framework · WordPress · Log in