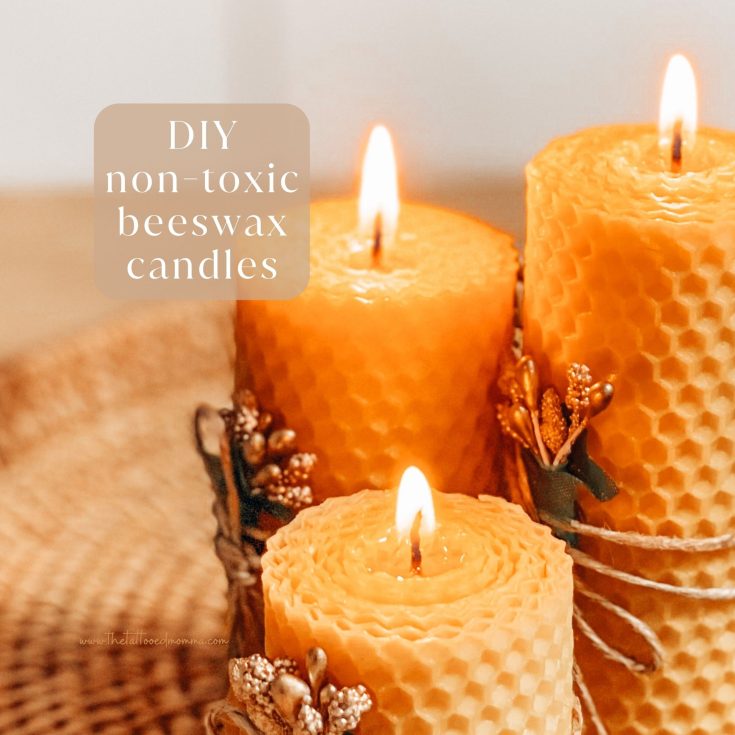
Homemade Beeswax Candles
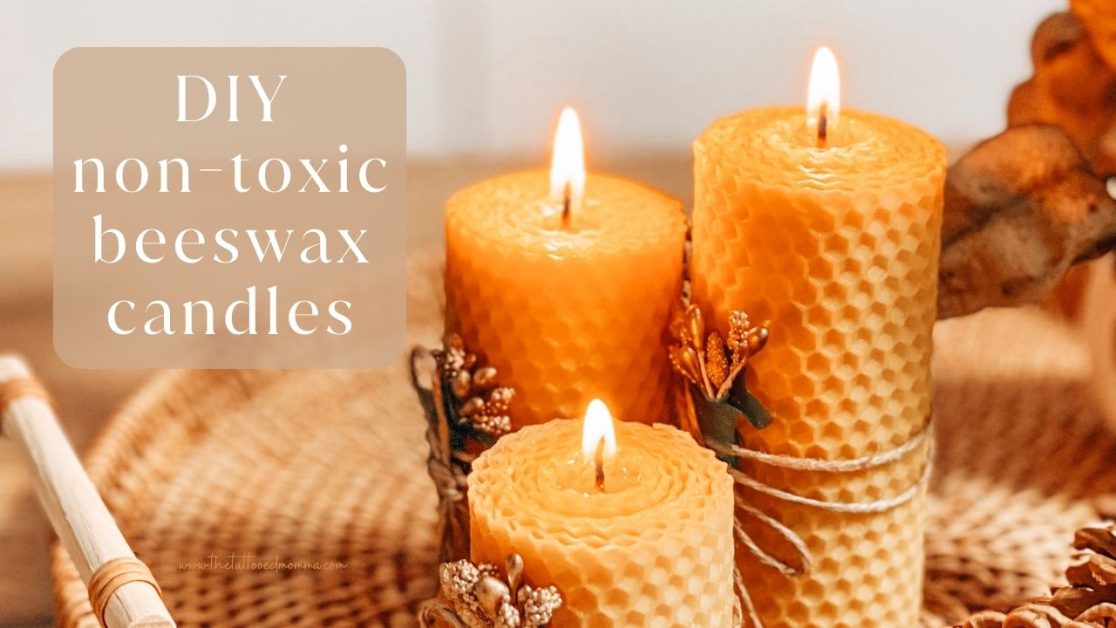
Learn how to make simple Homemade beeswax candles that only require 1 ingredient. Not only are these a great way to add some warm color to your space but they have a natural sweet scent which make any spot in your home feel cozy.
Where Do You Buy the wax for Beeswax Candles?
You can purchase raw beeswax from your local beekeeper or order it off Amazon. I’ve done both and both work great but there is a slight difference in scent and time.
Local Beekeeper
If you choose to get beeswax from your local beekeeper then you’ll most likely need to clean it. This is especially true if you want the most bang for your buck. Although it takes a bit more work, this is my preferred way because its inexpensive and you get a much stronger sweet beeswax scent.
Amazon
During the mess of 2020, my honey hook-up was completely SOLD OUT of EVERYTHING so I was glad to have a back up. In this case, I like using Beesworks beeswax pellets when I’m in a rush or all out of my stash because I know this is a quality product. It’s still 100% pure beeswax and with zero additives so it’s just like buying the stuff from your beekeeper but without the additional work of having to clean it. However, I’m not sure if I’m being biased here but I feel it doesn’t have as strong of a scent as the stuff you get straight from the beekeeper.

How to find a Bee Keeper
If you’re in the U.S. or Canada then you can find a local (and certified) beekeeper by searching the National Honey Board website here. Don’t be discouraged if the first company you call doesn’t have beeswax, it took me about 5 tries before I found my go-to guy.
Why You Should Switch to Beeswax Candles
Poisin! – Most of the candles sold in stores are made from paraffin which can be extracted from coal or wood but most of the paraffin is extracted from petroleum.
stay with me here, I have a point, I promise.
A 4 year study done by a University in South Carolina concluded that “petroleum based candles produced various alkanes, alkenes, toluene, benzene (a carcinogen) and some other chemicals…”
Purify The Air – According to countless sources, beeswax candles are said to purify the air because they produce negative ions. Negative ions are naturally abundant in nature which is why we feel happier around flowing waters, surfing the waves, climbing mountains, or just being in the forest.
to put it simply,
beeswax candles = chill vibes bruh
Now, these claims have never actually been confirmed but herbal medicine is said to NOT be effective either, so you can be the judge on this one. Whether the claim “beeswax candles produce negative ions” is true or not, I for one, can vouch that EVERY SINGLE TIME we light our beeswax candles, everyone’s mood improves.

Tips for How To Use Beeswax Candles
- As part of our bedtime routine, I like to light a beeswax candle because it sets a calm tone throughout the room and the kids watch the light-show flicker off the walls as they slowly drift to sleep
- Feeling intimate? The warm color from these beeswax candles makes everything romantic and the lighting only compliments your skin tone.
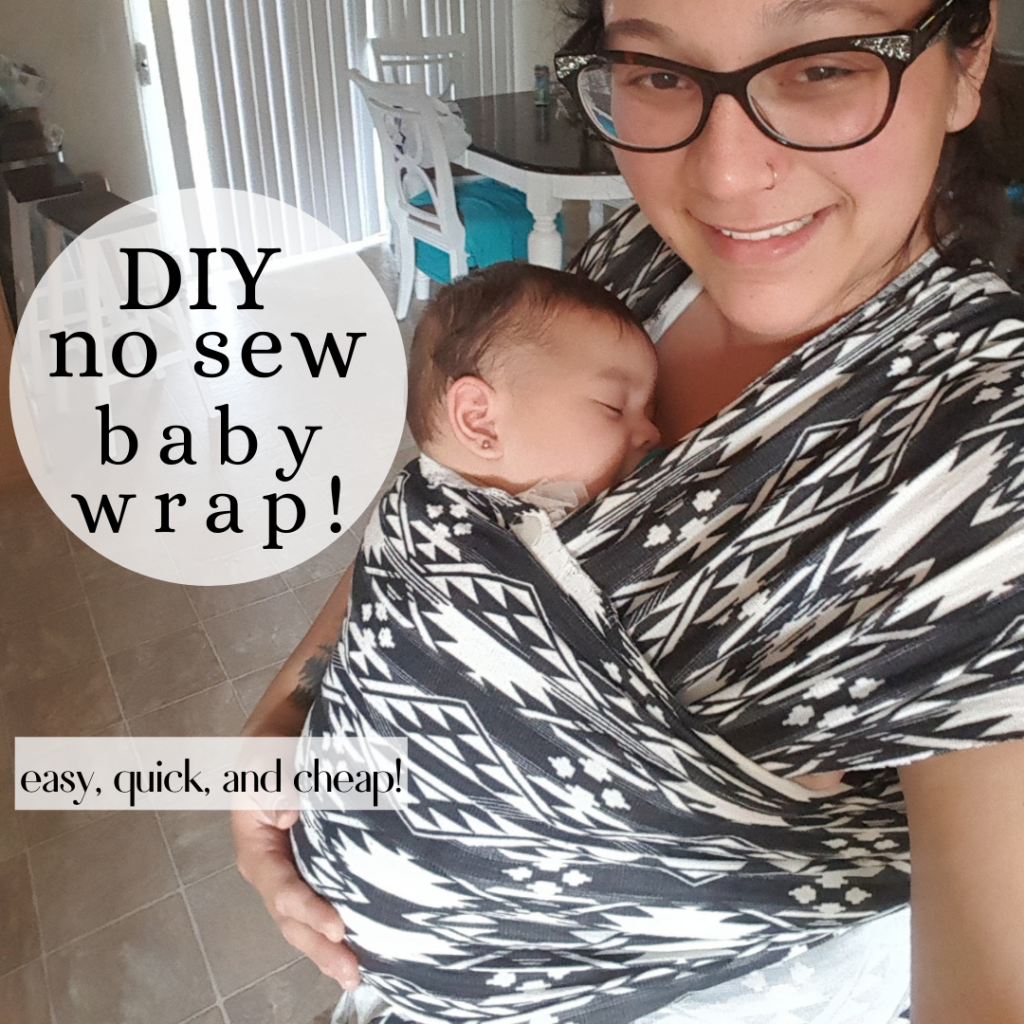
- Want more DIY’s? Then try out my viral No Sew Baby Wrap Carrier
- Watch this Youtube Short to see how cinematic these candles can make life.
This post contains affiliate links, which means I make a small commission at no extra cost to you but I only recommend products that I actually use and love. Read the full disclosure here.
Ingredients for Homemade Non-Toxic Beeswax Candles
These DIY beeswax candles are so simple and only require 3 items to make.
- beeswax
- candle wic
- heat resistant jar
- (optional) candle wic stickys

How to Clean your Beeswax
Step 1. (if you purchased beeswax that’s already been cleaned then scroll down to Instructions for How to Make Non-Toxic Beeswax Candles). First, add some water to a pot.

Step 2. Then add your raw uncleaned beeswax to your pot of water.

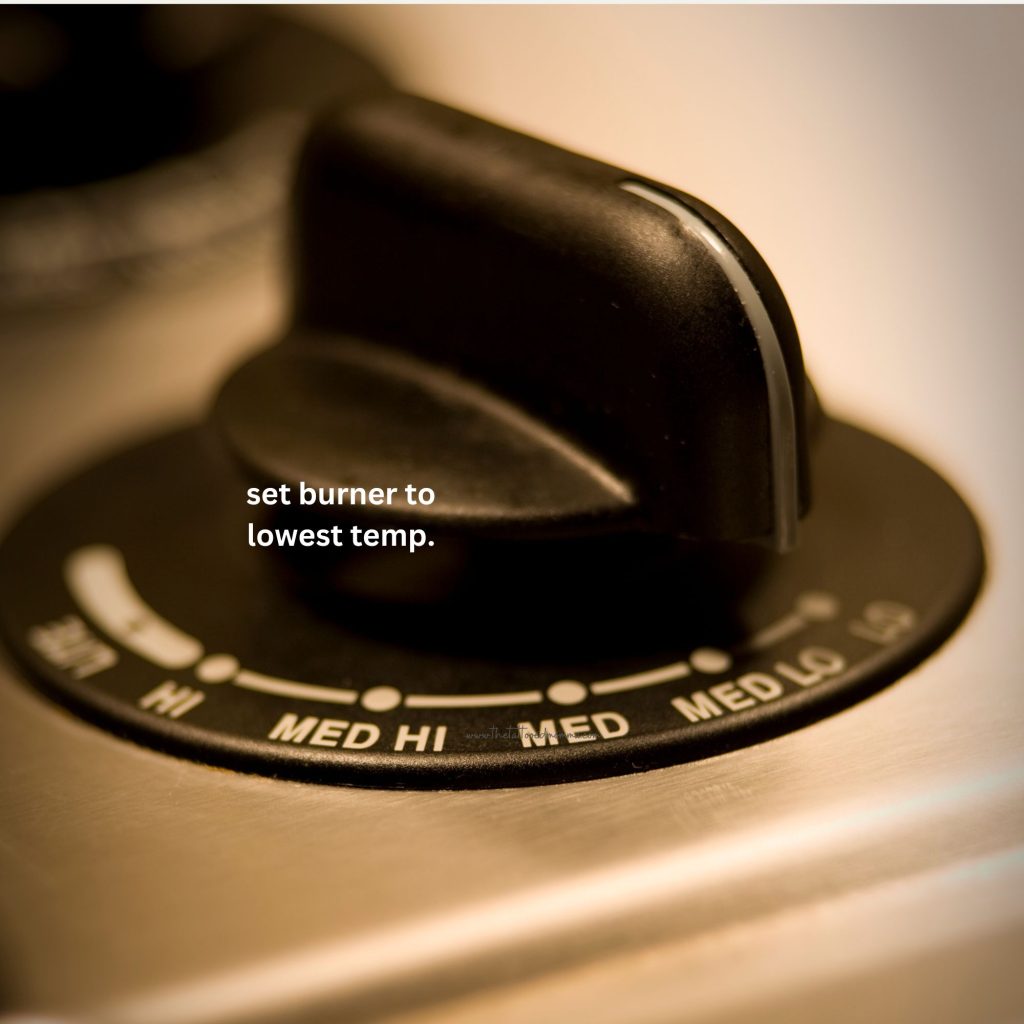
Step 3. At this point, set your pot on the stove and turn the heat to the lowest setting. (this step takes a really long time because you only want the beeswax to melt so low and slow is the name of the game here because we don’t want this stuff burning even a little bit)
Step 4. once your beeswax has completely melted into the water, move the wax away from the heat and let it cool completely. (If I have room in my fridge, I like to put the pot in the fridge to make the cooldown period go faster)

Step 5. As soon as your beeswax has completely hardened back up, pry the hardened wax out and pour the excess water out. (remember that there is still water underneath the wax so be careful when pulling the wax out.)
Step 6. Now flip the hardened beeswax over and scrap the imperfections away.
Step 7. repeat steps 1-6 until the beeswax is to your desired cleanliness. It usually takes me 3-4 rounds to get it clean enough.

Instructions for How to Make Homemade Non-Toxic Beeswax Candles
The hardest part of anything new is the thought process before you actually do it. After making these non-toxic beeswax candles in the comfort of your home, you’ll think “why didn’t I do this sooner, that was so easy!”
Step 1. Add your clean beeswax to a double boiler.
(If you don’t have a double boiler, no worries, I’m gonna show you how to make one. put some water in a pot then add a glass (or metal) bowl on top of the pot. viola, you have a double boiler)
still confused? watch this Youtube Short on How to Make Double Boiler
Step 2. add the wick
While the beeswax is melting, prepare your jars by adding the wicks. You can go about this in a few different ways. The first way is by hot-gluing the the wicks down. Two is using candle wick stickies or the third option is wrapping the wick around a pencil to keep it in place.
I’ve used all 3 methods but using the wick stickers is the only way for me now because its a fool proof way of making sure those things stay put exactly where I place them. The problem with using hot glue is that sometimes the wax is so hot that it remelts the hot glue then all that hard work of gluing them down was “aaaall for not” (in my Queen Elinor voice from the movie Brave). The issue with not using any type of glue and just wrapping the wick around a pencil/stick is that
A. it takes a lot of hands-on time and B. it has about a 50% success rate.

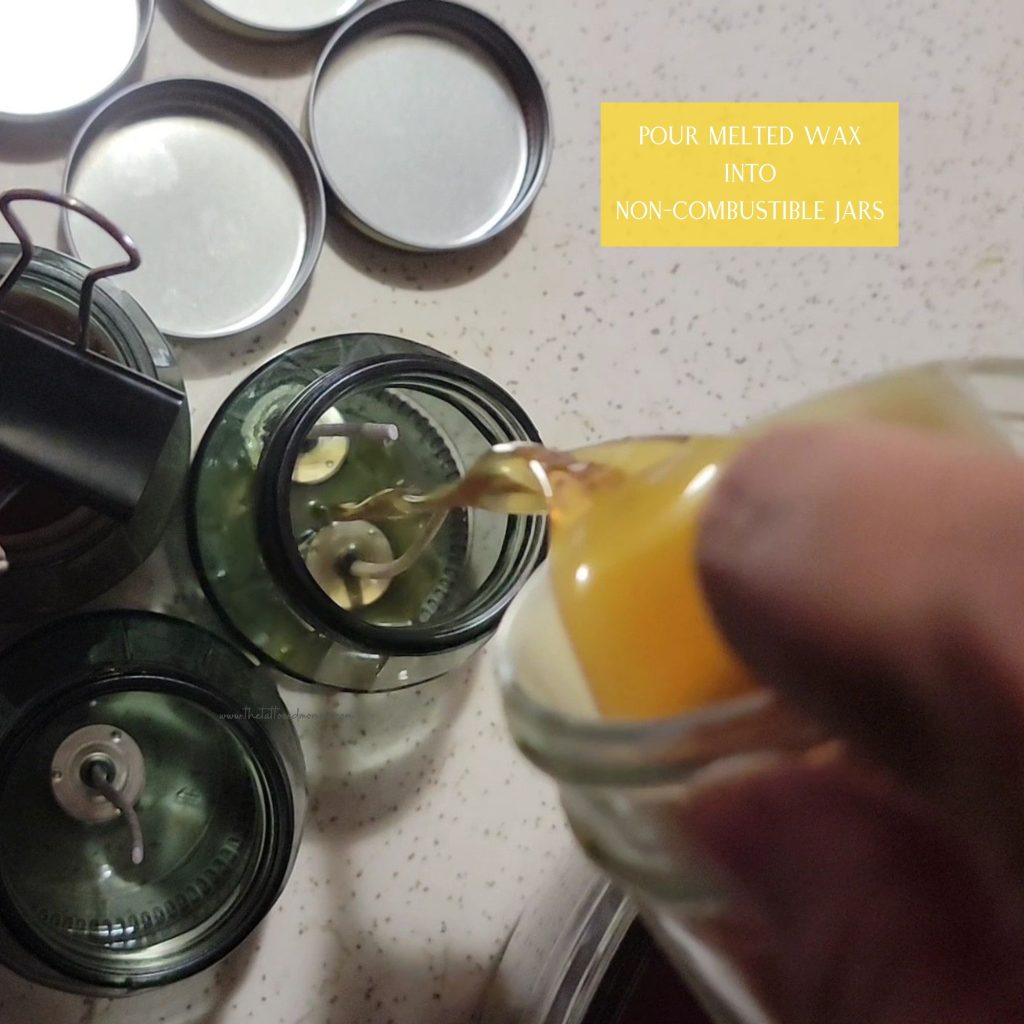
Step 3. Pour the melted beeswax in the jars
Once the wax has melted completely, you can begin pouring it into the jars. It’s nice to have dedicated tools for each hobby but I don’t so you’ll see me using one of our drinking cups to do this step.

Step 4. Secure the wick (optional)
After the wax is poured into the jar, you might notice that the tops of the wicks do not want to stay where you put them so if you have the budget or are going to be making candles a lot then I suggest investing in some candle wick holders. But an alternative to this is making your own hillbilly engineered candle wick holders using items from around your house. My favorite things to use to keep the tips of the wicks in place are paper clips, binder clips, and pencils.

Step 5. Light Those Beeswax Candles!
Finally, the best part of all is getting to light your freshly made beeswax candles! As soon as they have cooled down you can begin using them.
GIFTS!!!
This project is also a fantastic gift. I keep a few of these on hand to give away to guests or bring with me as a hostess gift. They are also a great way to elevate Christmas presents and your loved ones will enjoy receiving a homemade beeswax candle for special occasions like Valentine’s Day and Birthdays. Remember that we all are guilty of judging a book by it’s cover so the wrapping job is very important here. Add a scrap piece of fabric to the the top of the lid and secure it with a coordinating ribbon or bow for some added presentation.
Let’s Connect!
Items You May Need!
- beeswax
- candle wicks
- jars
- candle wick stickies
- ribbon
- glass bowl
- pot
- fabric scraps
- candle wick holders
- paper clips
- pencils
- binder clips

FAQ
Where do I find a beekeeper?
Go to honey.com and click on the locator tab to find a beekeeper nearest to you.
Can I use metal containers for my candles?
Yes, metal containers are generally safe for candle making, in addition to glass and ceramic.
Want more easy DIY’s and fun tutorials?
- enter your name and email into the form below
- select “homemaker email list”
- click submit
- (optional) come back and leave a review to let me know if you tried this tutorial.
Join our homemakers emails list!
Find more printable homemaking tutorials and DIY’s


If you make these beeswax candles and love them, I would love if you gave it 5 stars! Also, tag me on Instagram @thetattooedmommaofficial so I can see your awesome work!
How to Make Non-Toxic Beeswax Candles - easy
How to make simple Homemade beeswax candles that only require 1 ingredient. Not only are these are a great way to add some warm color to your space but they have a natural sweet scent and are an easy way to make any spot in your home feel cozy.
Materials
- beeswax
- candle wicks
- glass, ceramic, or metal containers
- pencils, paper clips, or binder clips
- (optional) candle wick stickers
Instructions
How to Clean your Beeswax (if you purchased beeswax that's already been cleaned then scroll down to Instructions for How to Make Non-Toxic Beeswax Candles).
Step 1. First, add some water to a pot.
Step 2. Then add your raw uncleaned beeswax to your pot of water.
Step 3. At this point, set your pot on the stove and turn the heat to the lowest setting. (this step takes a really long time because you only want the beeswax to melt so low and slow is the name of the game here because we don't want this stuff burning even a little bit)
Step 4. once your beeswax has completely melted into the water, move the wax away from the heat and let it cool completely. (If I have room in my fridge, I like to put the pot in the fridge to make the cooldown period go faster)
Step 5. As soon as your beeswax has completely hardened back up, pry the hardened wax out and pour the excess water out. (remember that there is still water underneath the wax so be careful when pulling the wax out.)
Step 6. Now flip the hardened beeswax over and scrap the imperfections away.
Step 7. repeat steps 1-6 until the beeswax is to your desired cleanliness. It usually takes me 3-4 rounds to get it clean enough.
Instructions for How to Make Homemade Non-Toxic Beeswax Candles
Step 1. Add your clean beeswax to a double boiler. (If you don't have a double boiler, no worries, I'm gonna show you how to make one. put some water in a pot then add a glass (or metal) bowl on top of the pot. viola, you have a double boiler)
Step 2. add the wick. While the beeswax is melting, prepare your jars by adding the wicks. You can go about this in a few different ways. The first way is by hot-gluing the the wicks down. Two is using candle wick stickies or the third option is wrapping the wick around a pencil to keep it in place.
Step 3. Pour the melted beeswax in the jars. Once the wax has melted completely, you can begin pouring it into the jars. It's nice to have dedicated tools for each hobby but I don't so you'll see me using one of our drinking cups to do this step.
Step 4. Secure the wick by using paper clips, a pencil, or a binder clip to keep the tip of the wick in place.
Step 5. Let the beeswax harden
Step 6. Light your beeswax candle!
Notes
- if you would like a scent other than pure beeswax then try mixing in a little cocoa butter, coconut oil, almond oil, shea butter, or play around with a few drops of essential oil. I like to start with a quarter cup of oil/butter then add more as needed. for the essential oils, just 3-5 drops per candle is enough.
my favorite scents to mix with the sweet smell of the beeswax are:
- cocoa butter and lavender essential oil
- lemon essential oil
- chamomile essential oil
Recommended
- How to Love Being JUST a Stay at Home Mom
- ULTIMATE Dirt Bike Gear Checklist – FREE printable
- How to Make Homemade easy non-toxic Beeswax Candles
- Easy Homemade Avocado Oil Mayonnaise Recipe
- How I Got Pregnant with PCOS 5x
Sources
https://pathwaysmv.org/the-truth-about-beeswax-candles-2/
Search Bar: beeswax, bees wax, beewa, bee wa, candles, candle, homemade, homemaking, gifts, valentines day gifts, christmas gifts, bee keeper, propolis, wax, soy candle, vegan candle, candle making