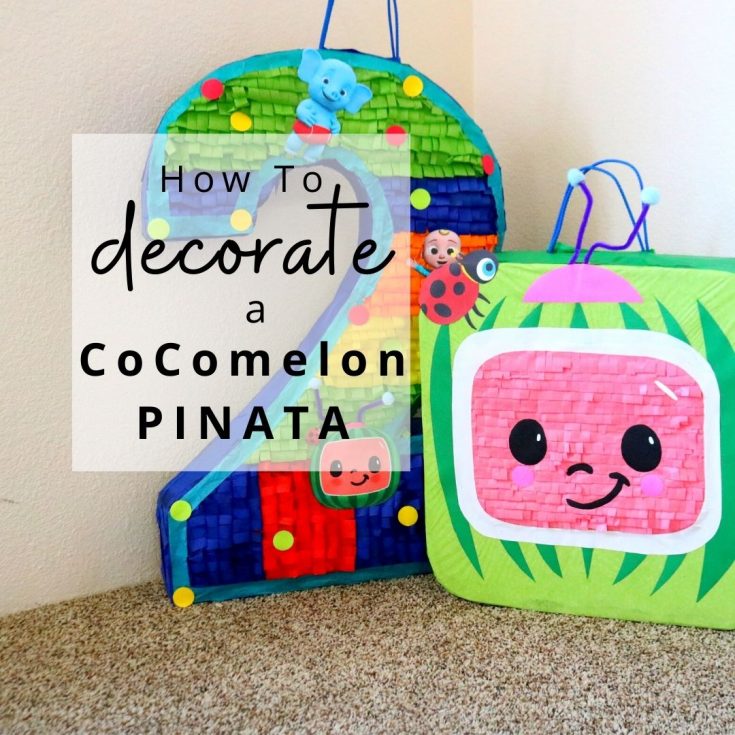
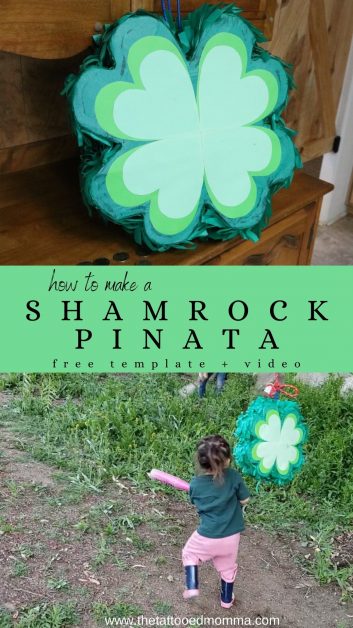
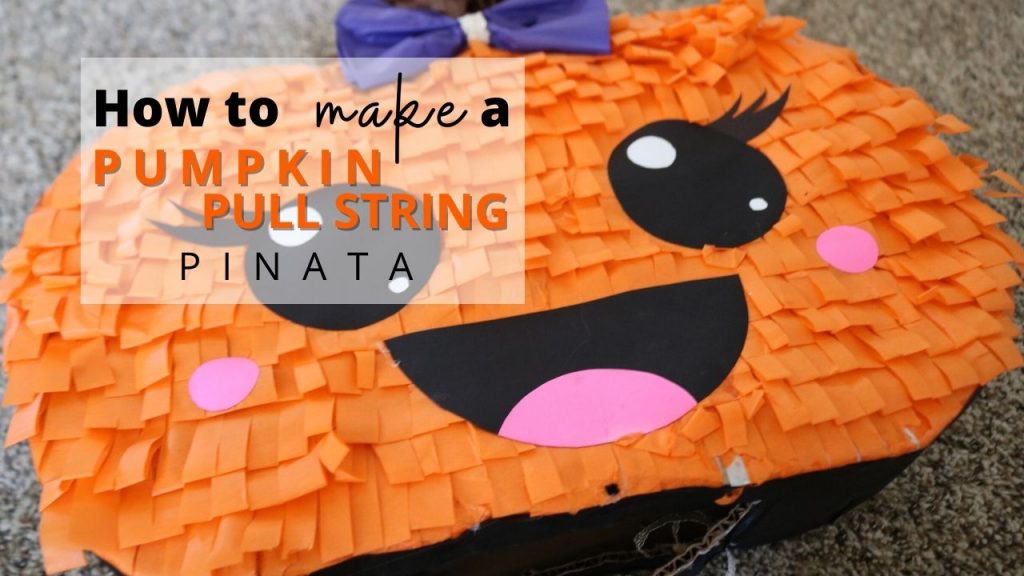
How to Make a Pumpkin Pull String Pinata
Easy to follow step by step tutorial to make your very own Pull String Pinata – pumpkin.
Let’s cut the chit chat and get right into it. You can also scroll down for the printable how to.
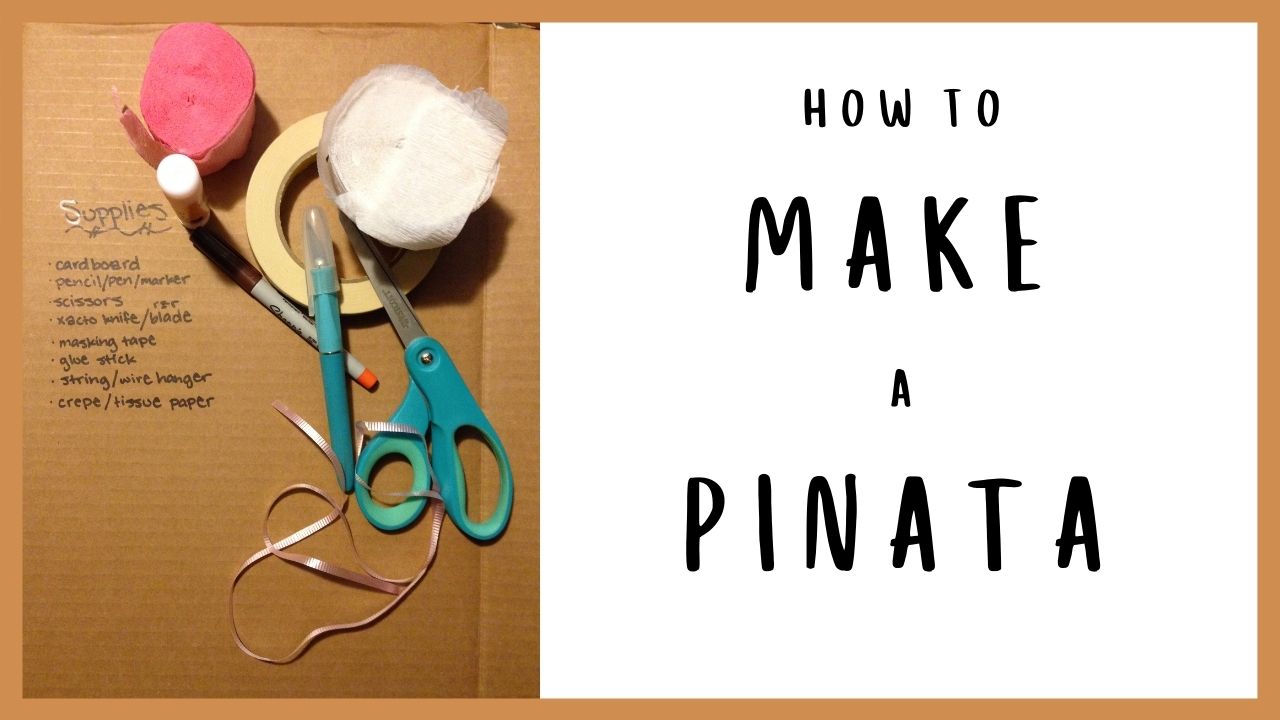
SUPPLIES TO MAKE A PUMPKIN PULL STRING PINATA
- cardboard
- hot glue gun
- scissors
- pen or pencil or marker
- box cutter or razor
- masking tape
- string/ribbon
- rope (for the pinata handle)
SUPPLIES TO DECORATE A PUMPKIN PULL STRING PINATA
- orange, black, and brown (or green) tissue paper
- school glue
- paint brush
- water
- mixing bowl
- pink, black, and white cardstock
- purple tissue paper (for the bow)
Step by Step Guide
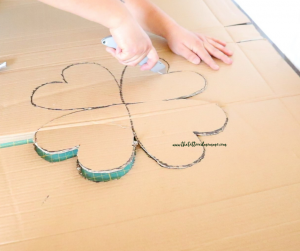
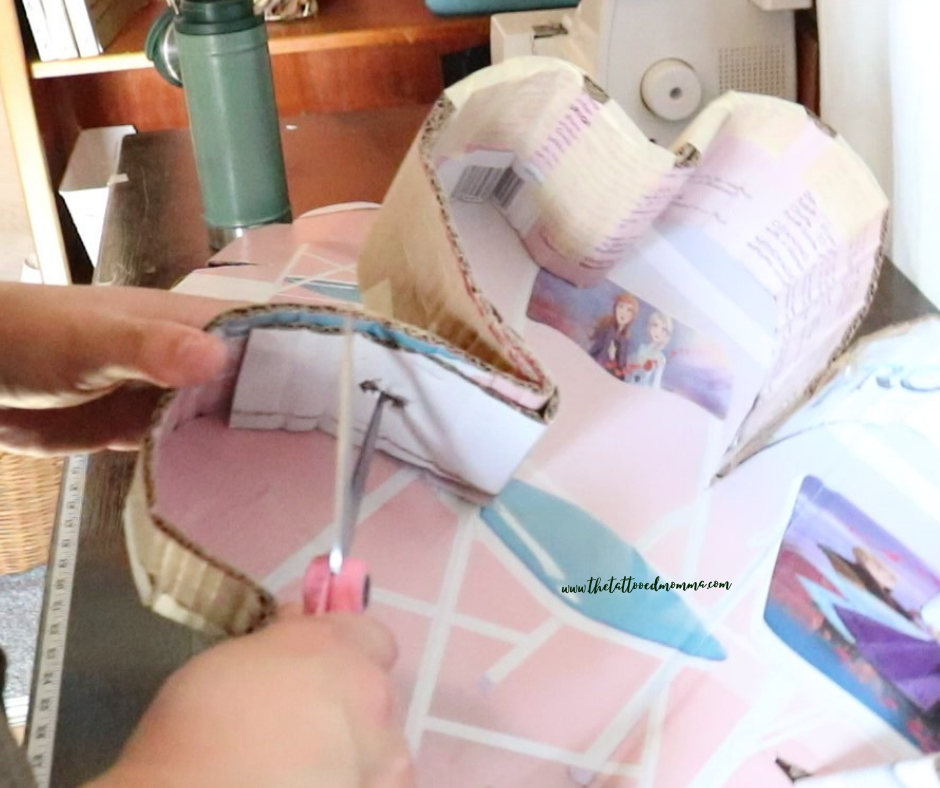
- cut out shapes
- trace then cut 2 pumpkin pieces out of cardboard. click one of the pictures below for a FREE printable template.


scroll to bottom for video how to
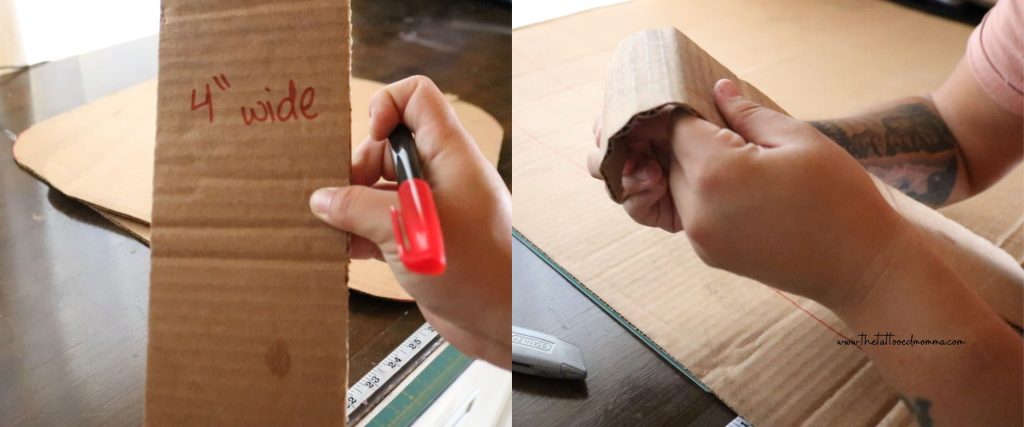
- 4″ strips for sides of pinata
- cut out a few 4” wide cardboard strips – length doesn’t matter
cut against the corrugation because it will make things easier when bending the sides around the top and bottom pinata pieces.
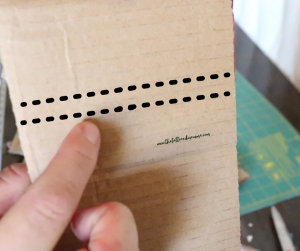
- prep the masking tape
- Rip off a bunch of pieces of masking tape then place them around your work area
This is not a “less is more” situation so go overboard because we will be using a lot of tape.

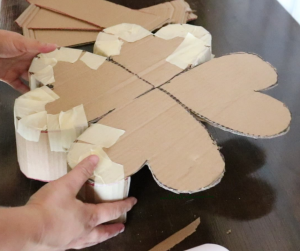
- Assemble Pinata
- Take one of your top or bottom pieces then start attaching a 4” side piece using the pre cut masking tape.
To connect another 4” side piece, slide it in the back of the already attached piece then staple them together.
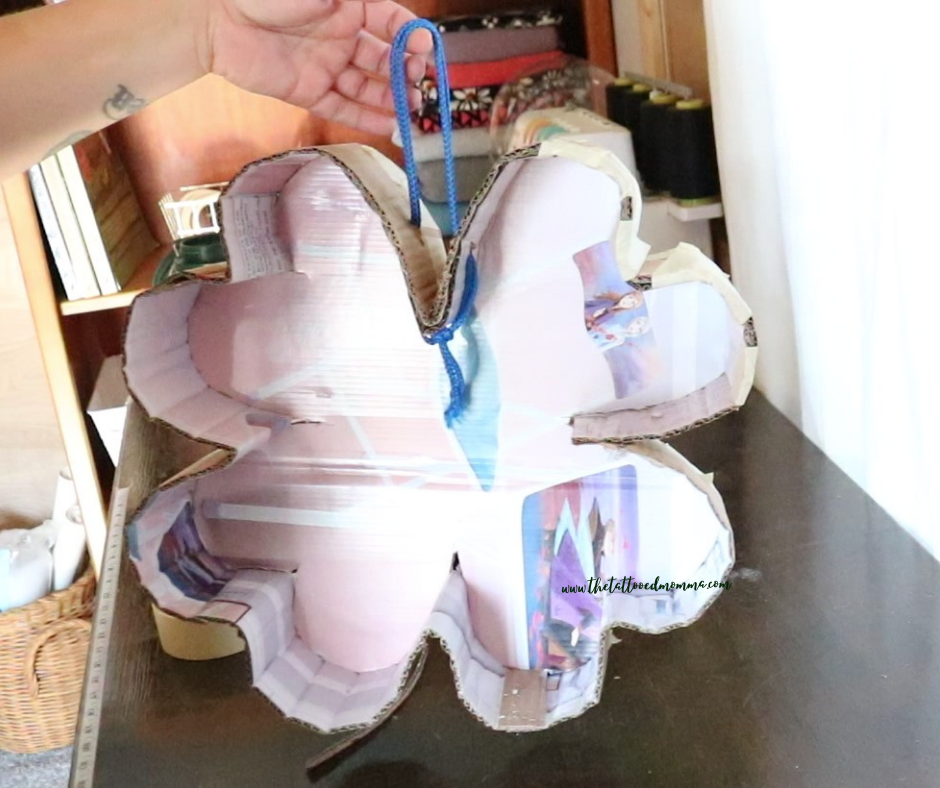
- Attaching the Rope
- poke 2 holes in the top of the pinata to loop the rope through
- cut a piece of rope, loop it through, then tie a knot at each end to secure it in place
- give it a good tug to make certain it’s secure
- Strengthening the Pinata
- Take a left over 4” side piece and cut it about 5-7” long then bend it into a tube and secure it with a piece of masking tape.
- using a glue gun, attach the tube in the center of the piñata
Since this is a pull string pinata, it only need 1 tube.
- Attach the other top Piece
- do this the same way you did the first piece by taping 4” side pieces until you’ve gone all the way around.
For funny reels and daily extras, follow me on instagram
- Decorate
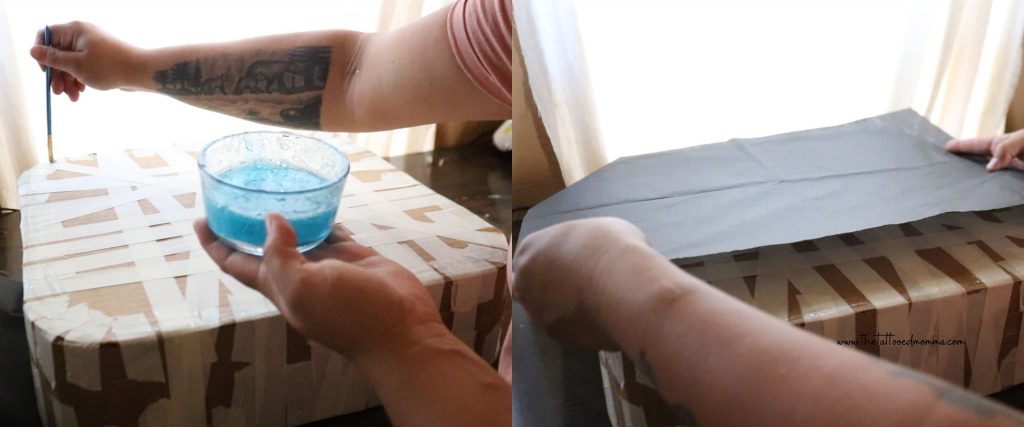
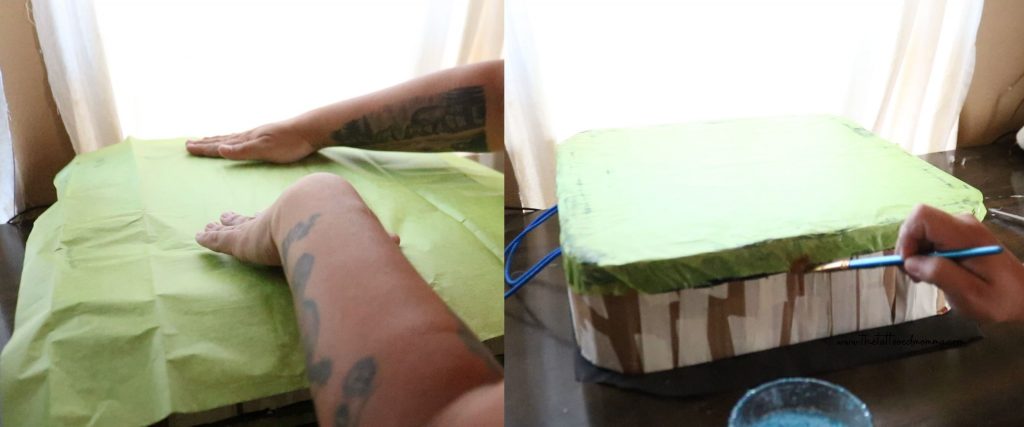
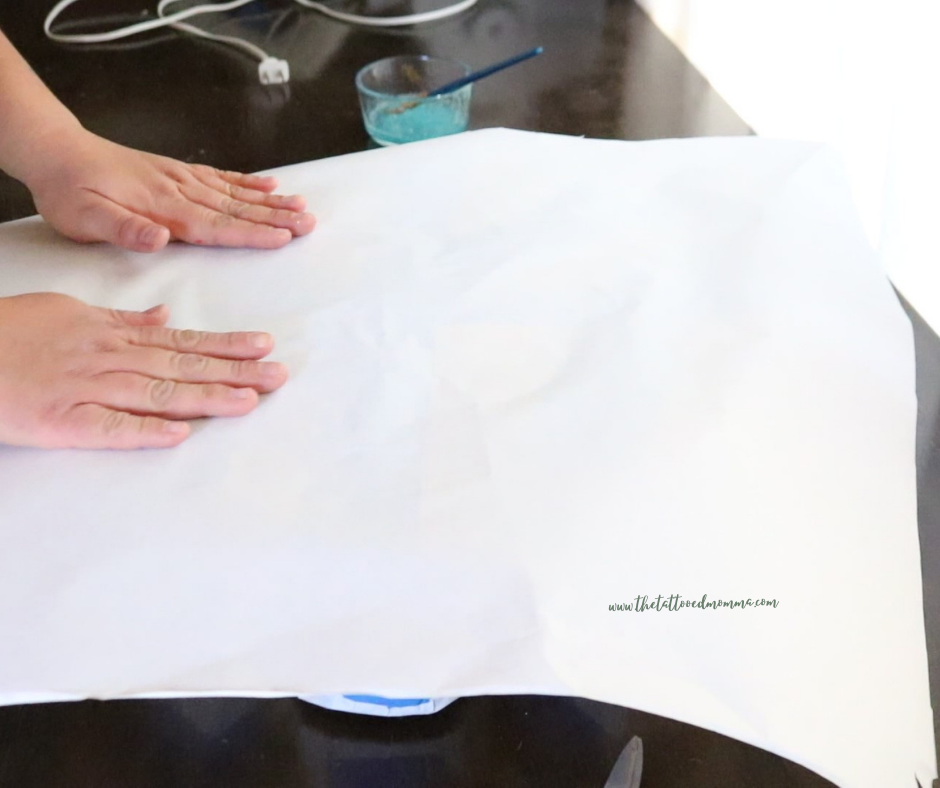
- glue mixture
- make a glue mixture by combining school glue with water until it is about the consistency of pancake batter.
- back piece
- put glue along the edges of the back side of the pumpkin then add 2 layers of black tissue paper.
- glue any excess tissue paper that is hanging over down the sides of the pinata.
- front piece
- glue orange fringed tissue paper to the pumpkin by starting at the bottom then working your way up 1 line at a time.
- to make the fringe, cut the tissue paper into 4″ wide strips – length doesn’t matter. Fold the 4″ tissue paper strips in half then start cutting little slices from one end to the other on the folded side. Only cut about 3/4’s of the way up and try doing multiple pieces at once to save time.
- once finished, trim off any excess fringe that is hanging over.
- the pumpkin stem
- use brown fringed tissue paper for the stem
- glue mixture

- Decorate cont.
- sides
- cut 4″ wide strips of black tissue paper then glue them all the way around the sides.
- the face
- black eyes – I traced a ribbon roll (about 3 & 1/2 inches wide)
- white specs in eyes – I traced a nickel and new pencil eraser
- black mouth – I traced a half circle ruler then trimmed it down to fit below the eyes.
- pink tongue – I free hand drew a half circle, glued it to the black mouth, then trimmed off the excess.
- rosy cheeks – I traced a quarter
- sides

- Decorate cont.
- bow (any color tissue paper)
- cut a whole piece of tissue paper in half, discard one piece, then fold the leftover piece in half. Turn it long ways and fold it over itself until you have a folded up rectangle.
- start in the center and pinch and fold the tissue paper back and forth to make it look like a bow.
- tie a ribbon around the center to secure then glue it onto the pumpkin.
- bow (any color tissue paper)

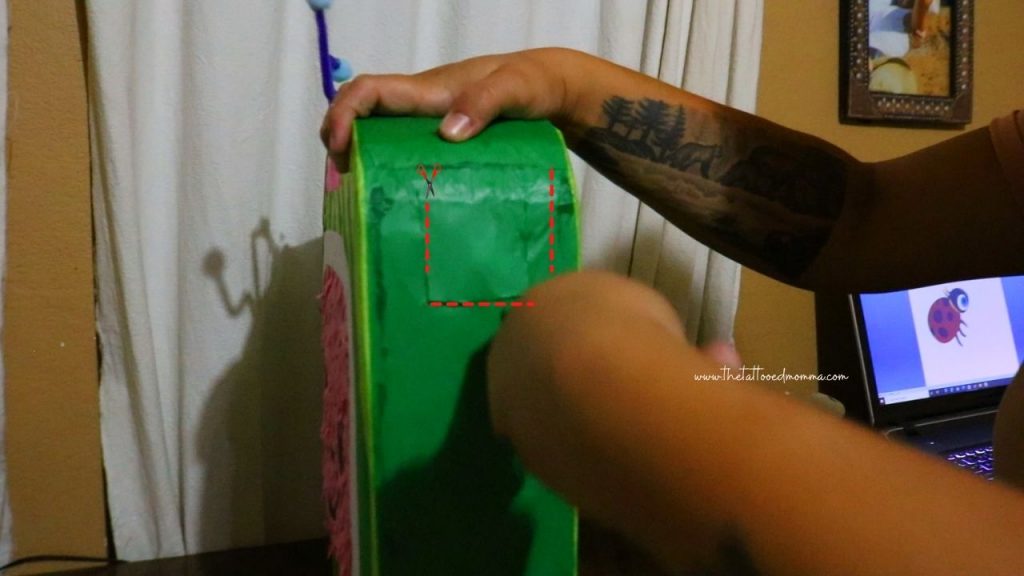
- Pull String
- make 3 slits in the bottom of the pinata to form a flap then poke a bunch of holes into the flap for the strings to fit through.
- make a huge knot in one of the ribbons so it can’t slide through the hole. (You can add some hot glue to it if needed for extra security.
- slide the rest of the ribbons into the holes. Do not tie knots into these because you want these ribbons to be able to slide out of the holes easily.
- Cut a small piece of cardboard then staple it onto the flap with half of it hanging off.
- Fill the pinata with toys or candy and push the pull string flap back in place.
And that’s it! I would love to see what you created so tag me on instagram! @thetattooed.momma